Android POS Interface


⬇ Explore the functionalities of the product page by toggling between tabs below.⬇

After logging in and starting a shift on EPOS Frontend POS, users will be directed to the main Sales page. The image below shows each function on the main Sales page. 
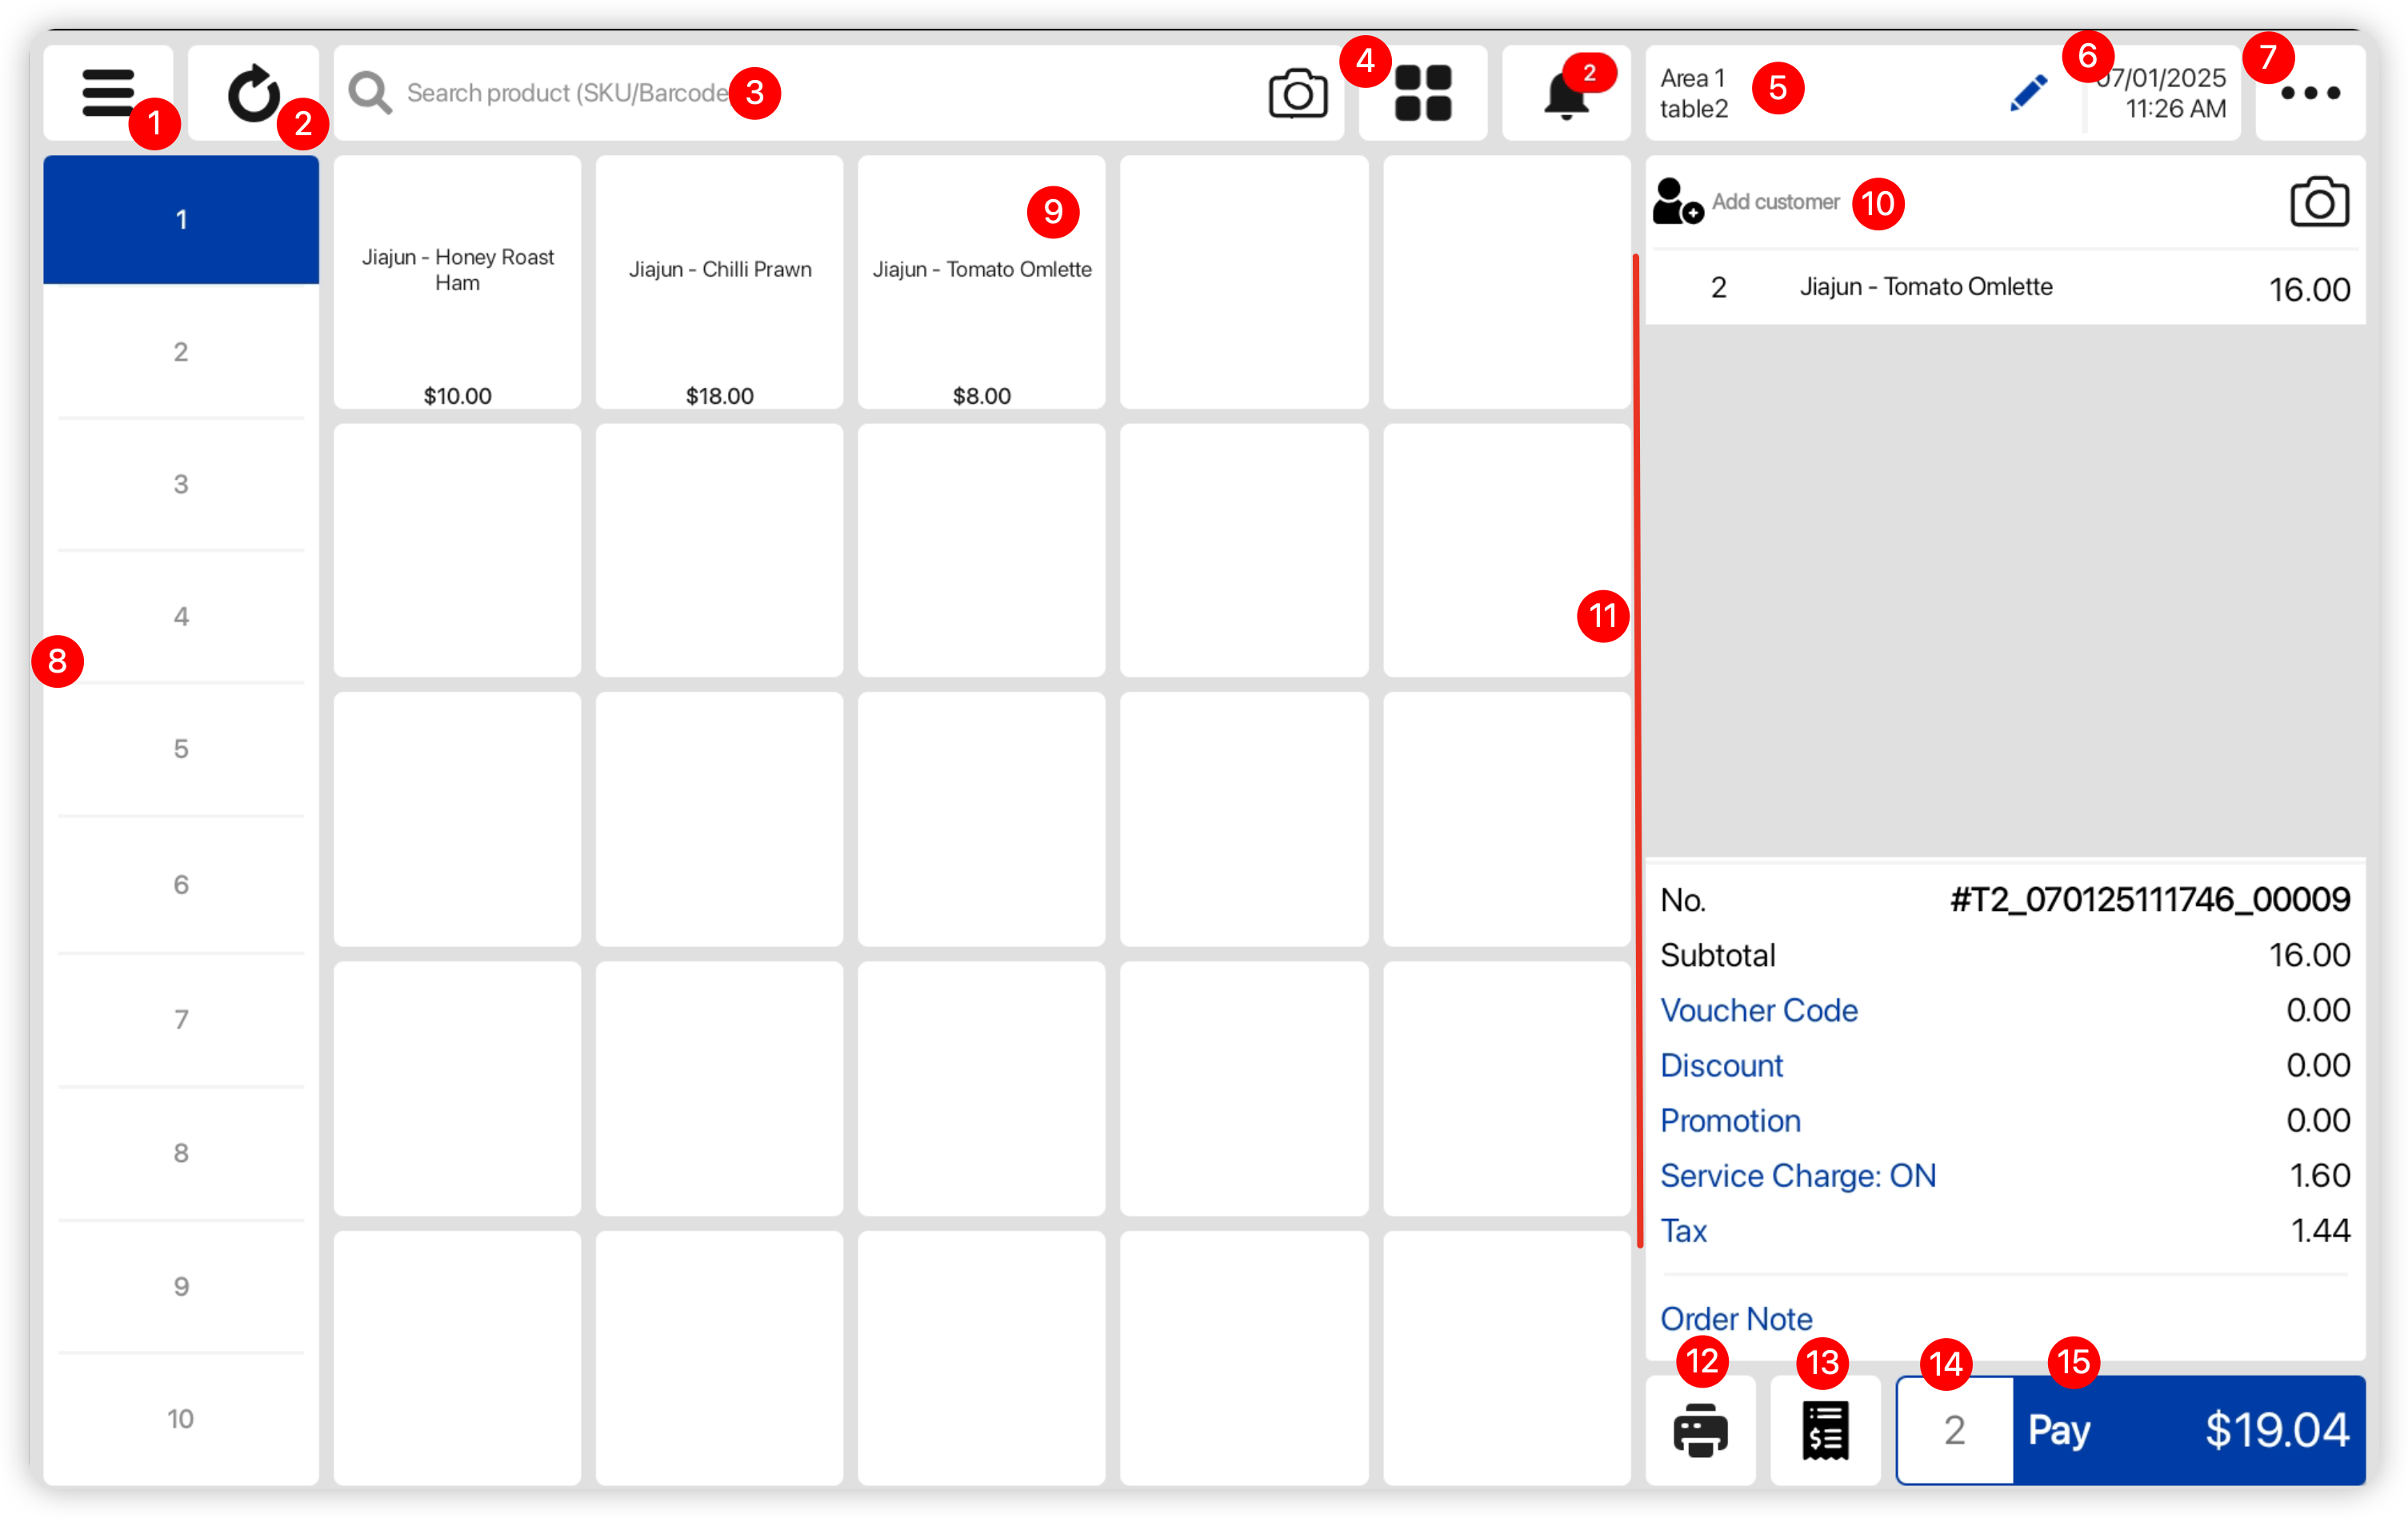
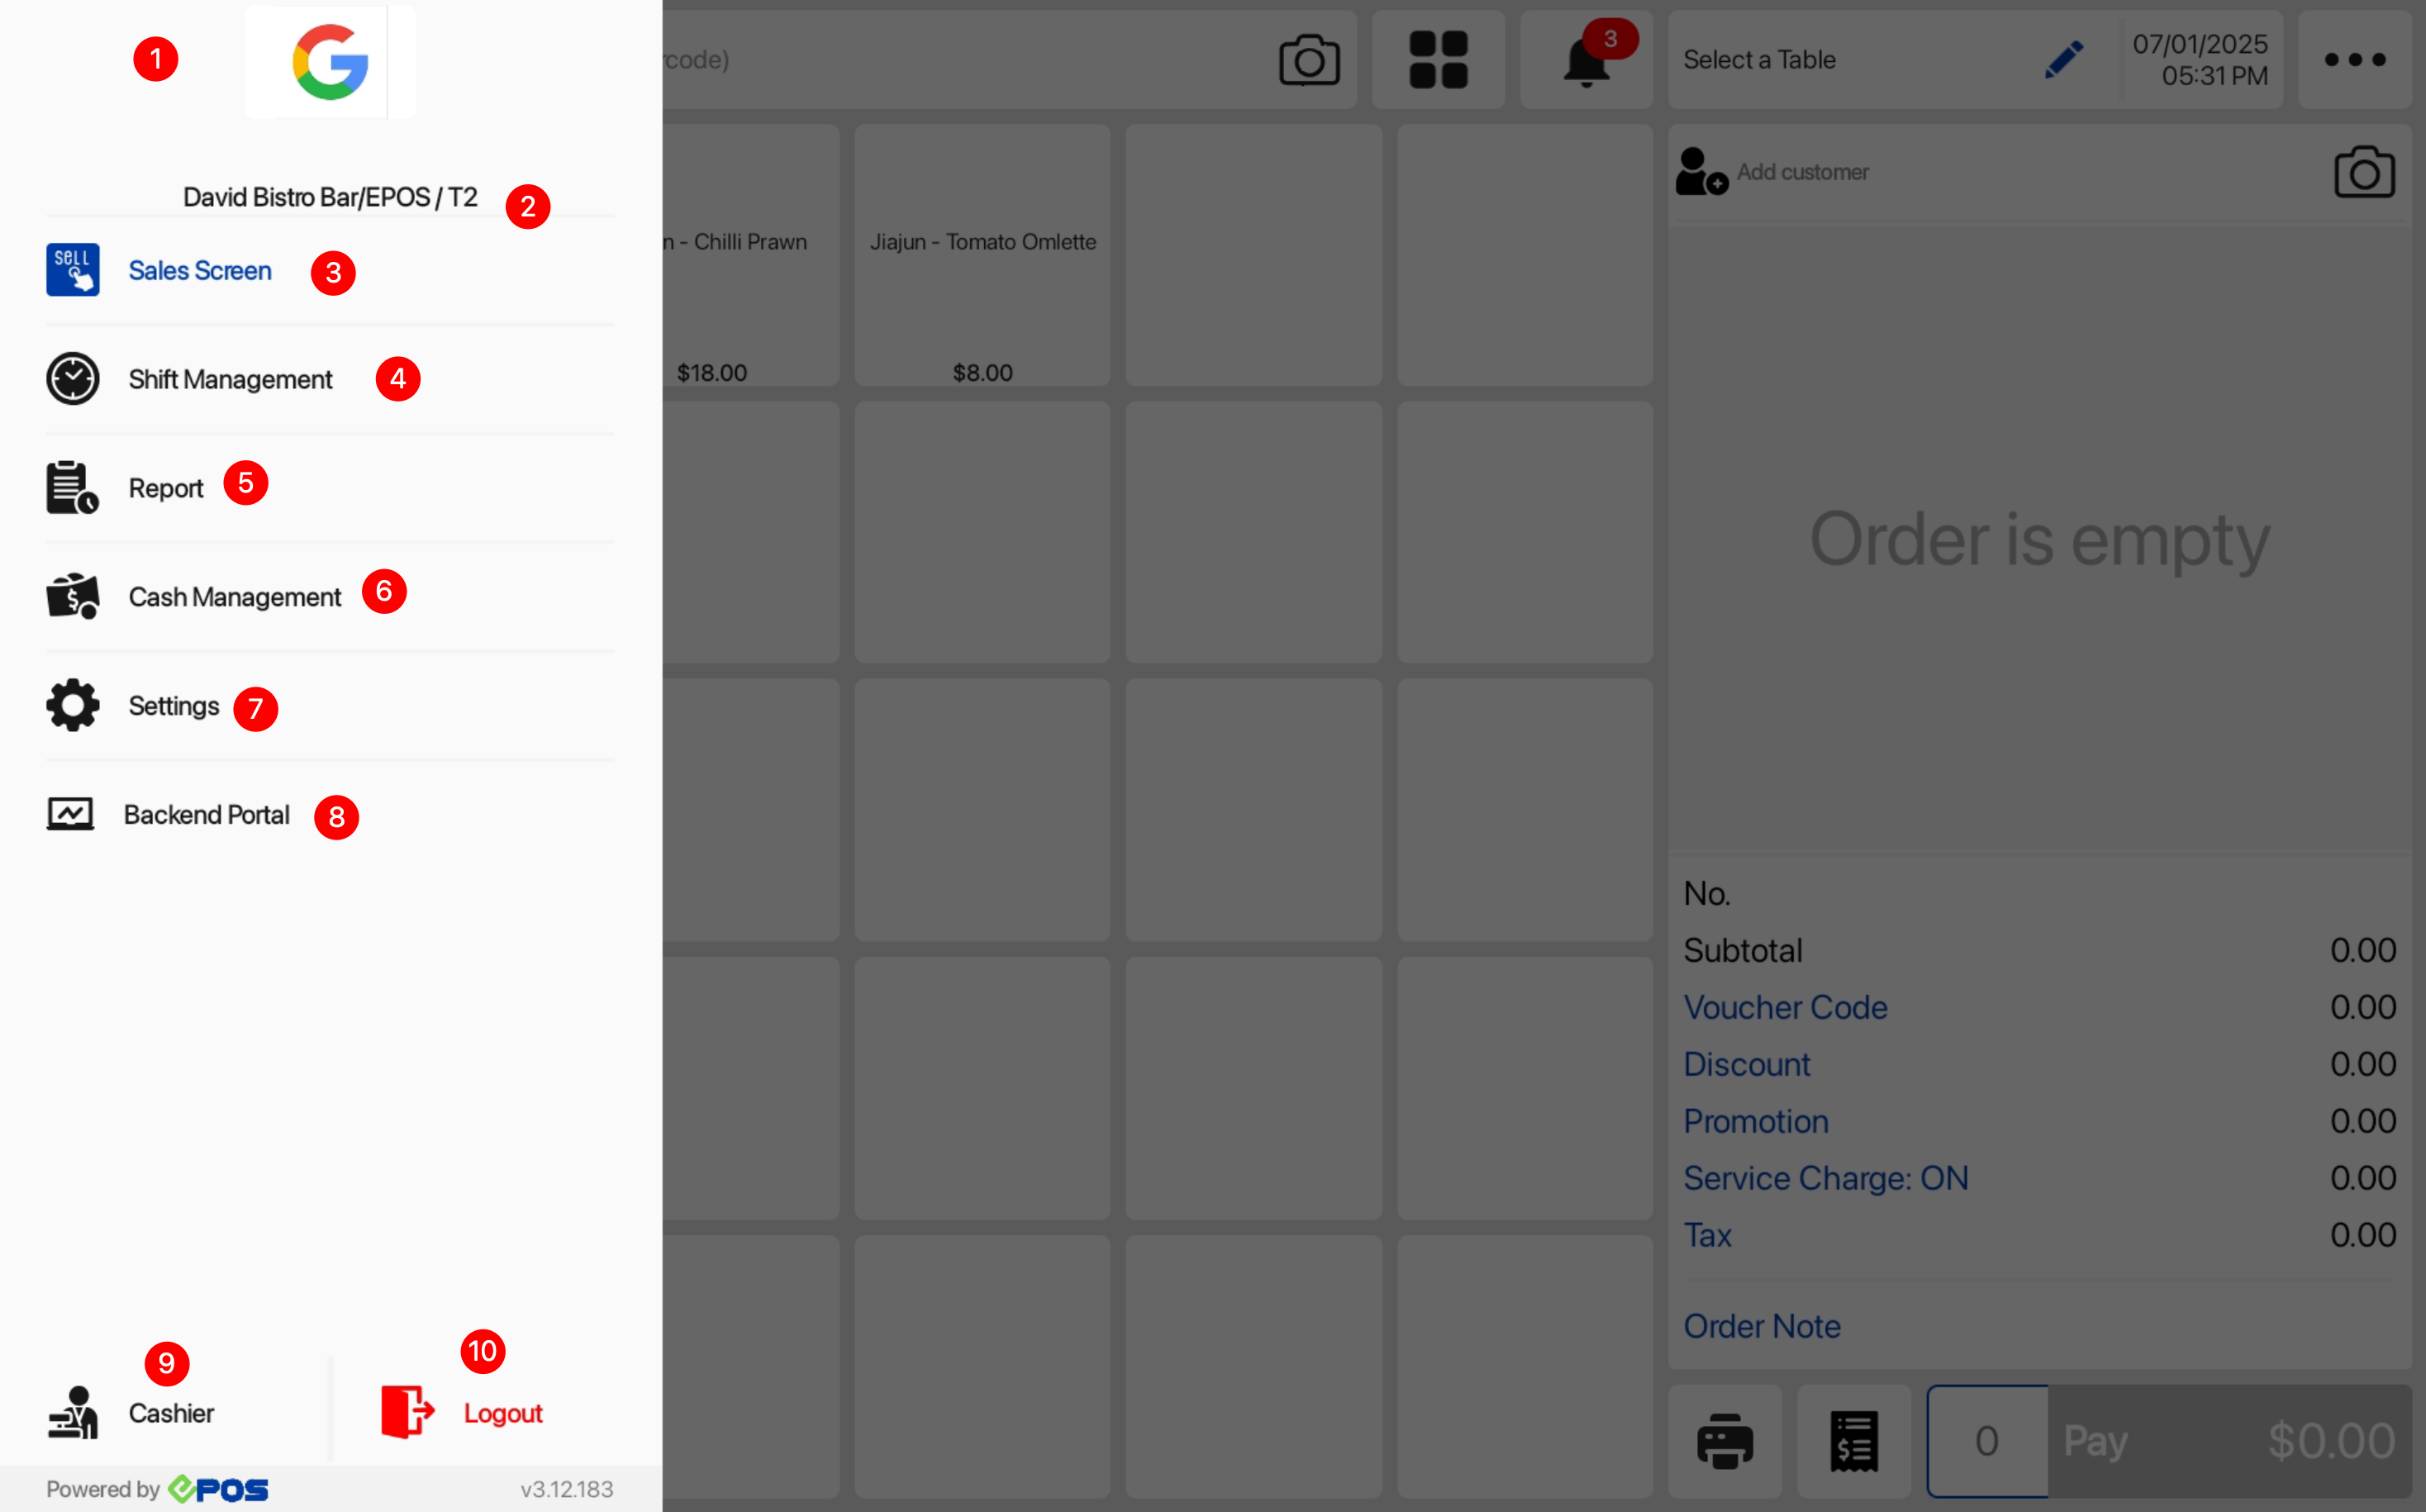
1. POS Sidebar menu

Display menu which allow users to perform EPOS Frontend POS related actions

2. Sync

Allow users to sync any changes made on Backend portal to Frontend POS immediately

3. Search

Allow users to search for existing products and create new product

4. Table Management

Display table layout and table orders

5. Select a Table

Allow users to select a table and tag orders to it

6. Date/Time

Display current date and time
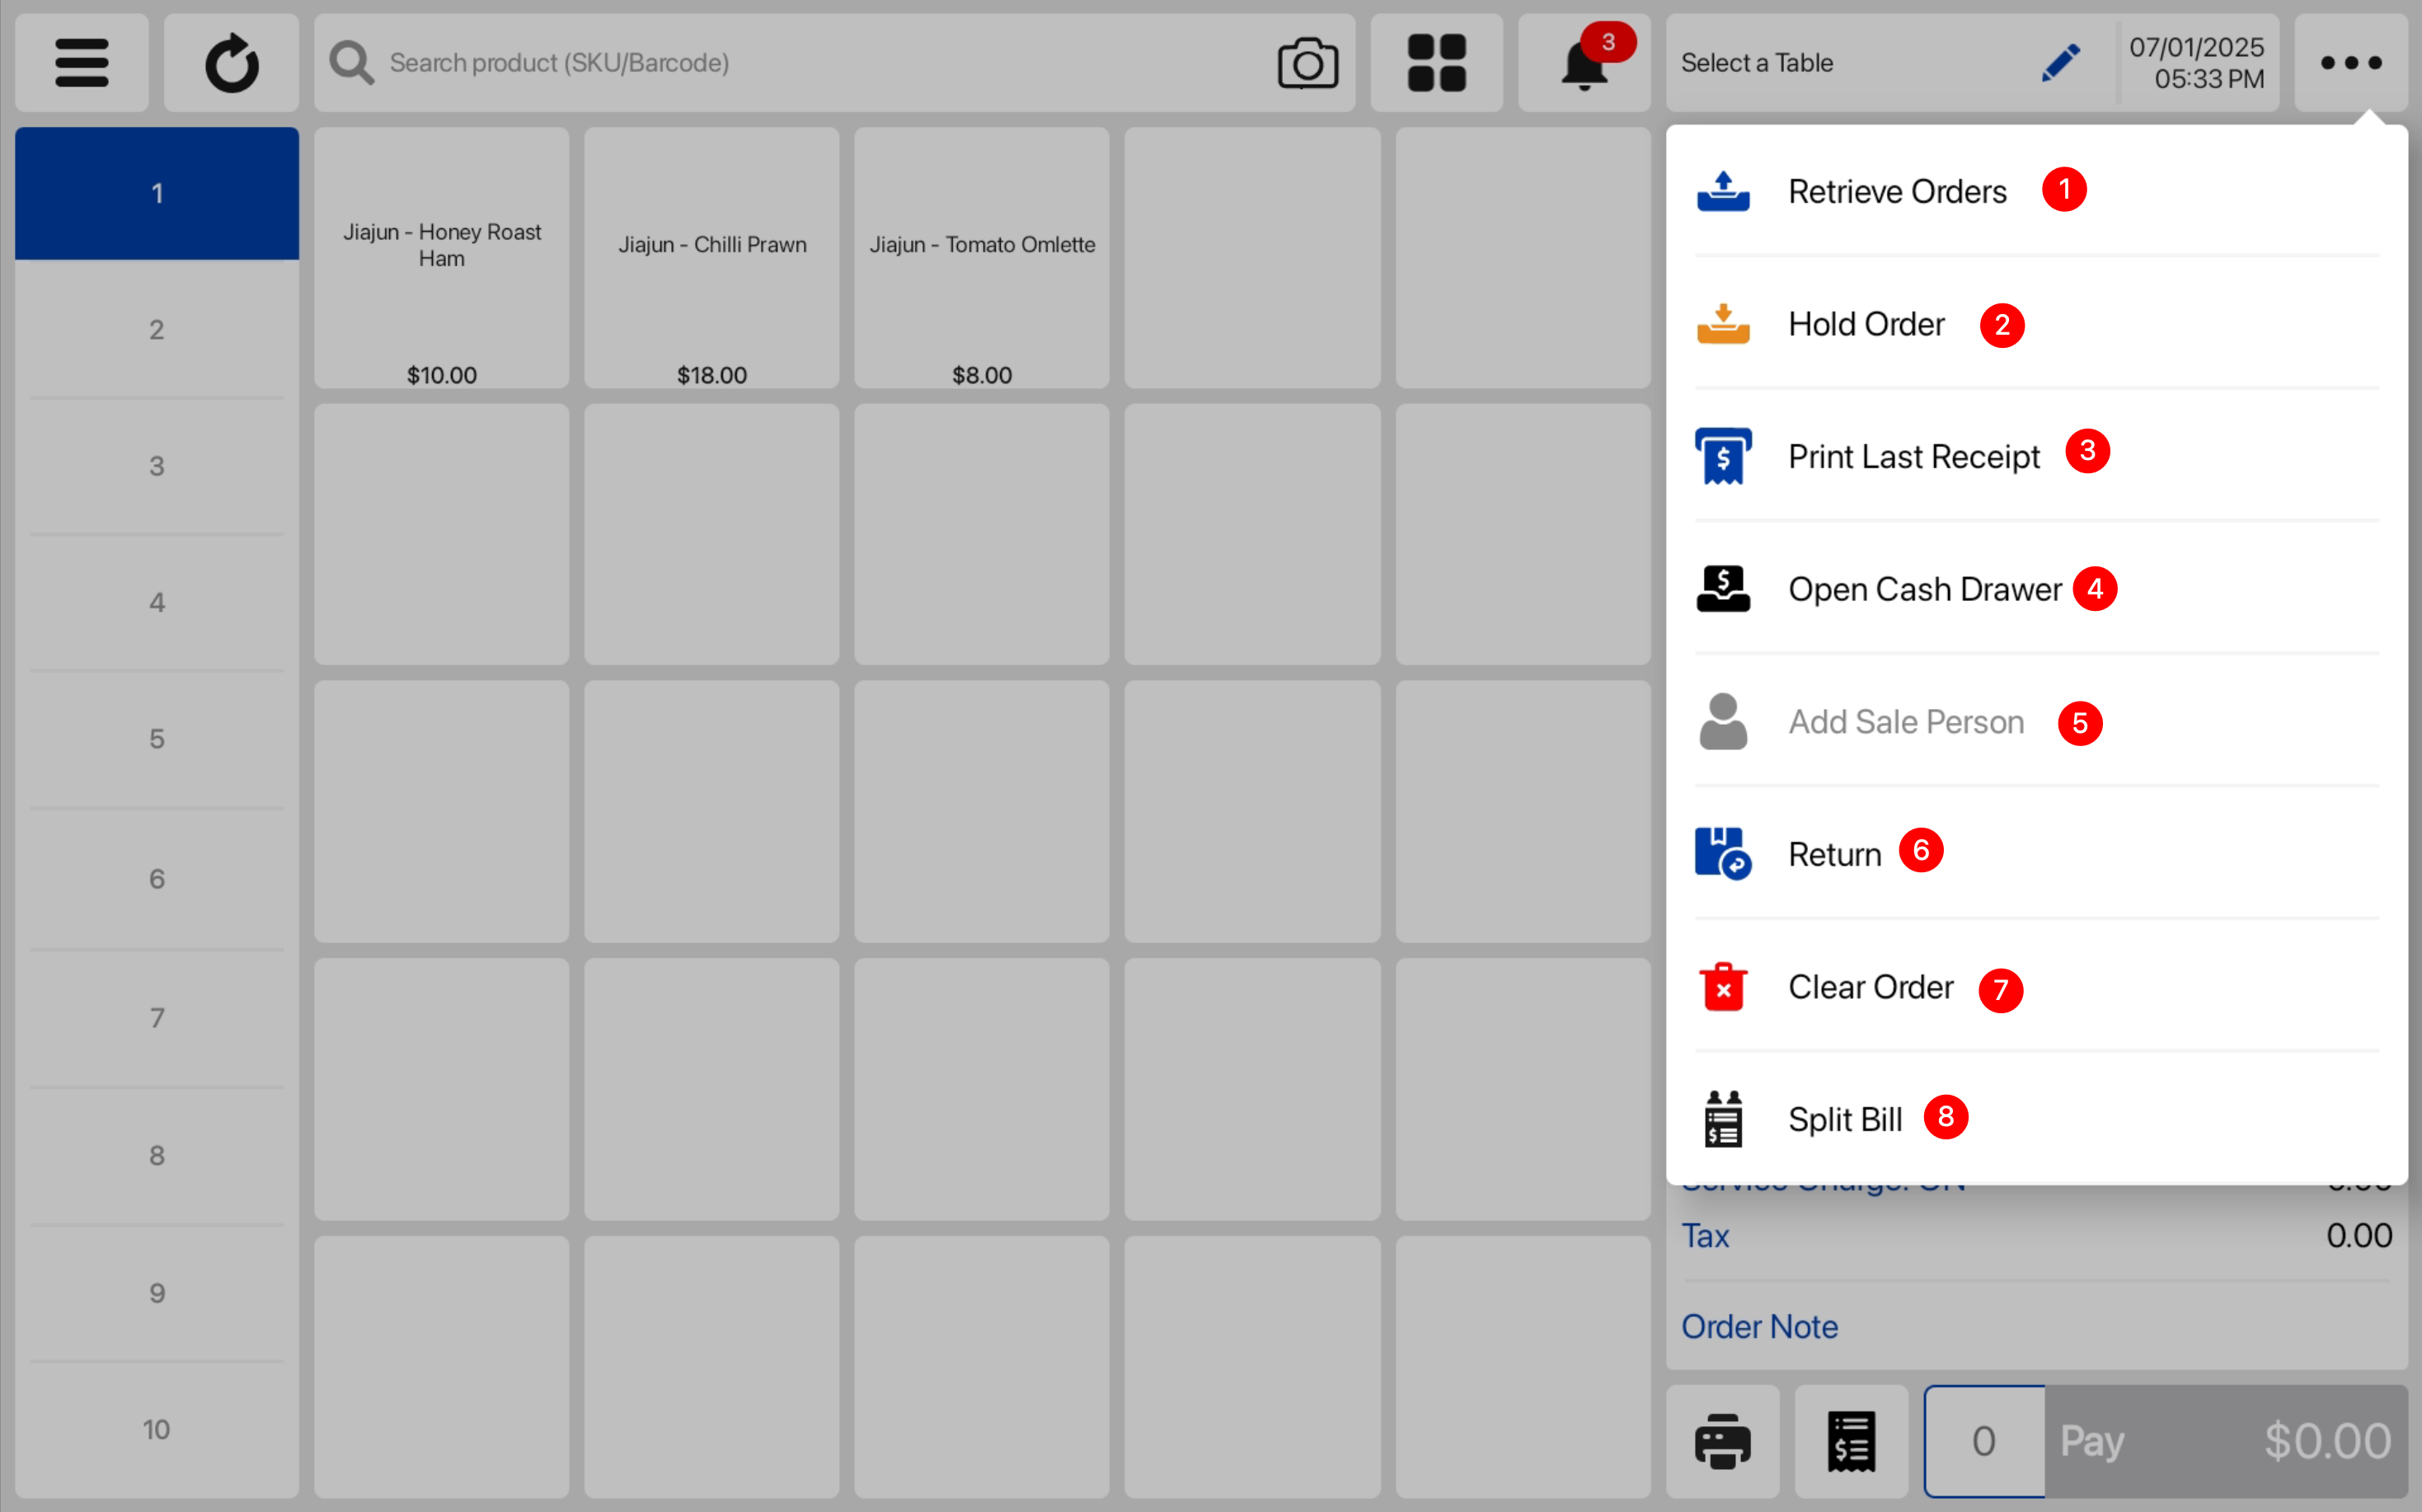
7. POS Order menu

Display menu which allow users to perform order related actions

8. Quickpick Pages

Allow users to add items into 10 different quickpick pages

9. Quickpick Products

Allow users to add items/group of items into the cart

10. Customer

Allow users to search for existing customers and create new customer

11. Order Information

Displays products in order cart, order no, subtotal, voucher code discount, discount, promotion, tax

12. Order Note

Allow users to enter order note

13. Send to Kitchen

Allow users to send items to the kitchen printer and KDS manually

14. Number of Items

Display the total number of products in the order cart

15. Pay

Allow users to checkout the current order and proceed to the payment page


Users can click on the icon on the top left to access the POS Sidebar menu. 

The image below shows each function on the POS Sidebar menu. 

1. Logo

Logo will be displayed as the logo set for receipt 

2. POS Terminal

POS name

3. Sales Screen

Direct users to the Sales Screen

4. Shift Management

Allow users to end the current shift

5. Report

Allow users to view transactions performed

6. Cash Management

Allow users to perform cash in/cash out functions

7. Settings

Direct users to the Settings page

8. Backend Portal

Direct users to EPOS Backend Portal

9. Staff on duty

Display the name of the staff logged into the POS

10. Logout

Allow users to log out from current session


Users can click on the icon on the top right to access the POS Order menu.

The image below shows each function on the POS Order menu.

1. Retrieve Orders

Allow users to retrieve sales which are set aside

2. Hold Order

Allow users to set their sales aside

3. Print last Receipt

Allow users to print receipt of the most recent transaction

4. Print Pre-Settlement

Allow users to print pre-settlement bill, will be shown as long as table management module is enabled for users

5. Open Cash Drawer

Allow users to open the cash drawer manually. This will be recorded at the end shift report and backend shift report.

6. Add Sales Person

Allow users to apply sales person to the order

7. Return

Allow users to perform order returns

8. Clear Order

Allow users to clear all the products in the order cart

9. Split Bill

Allow users to split the order according to Pax/Items/Mix

10. Delivery Detail

Allow users to view the delivery detail of the selected customer