No products in the cart.
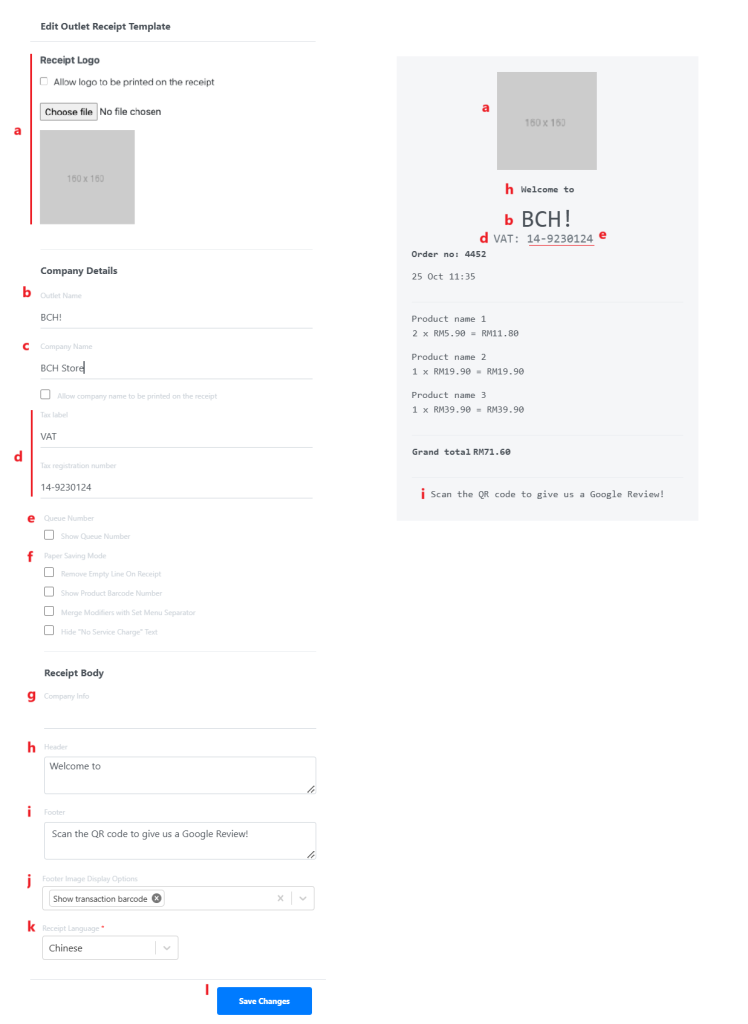
a. Receipt Logo
Allow users to upload the receipt logo. This logo will also be displayed on the 10” or 15” second displays.
b. Outlet Name
Will be pre-filled with Outlet Name, users can edit as preferred.
c. Company Name
Will be pre-filled with Company name registered with EPOS.
d. Tax Register Details
Allow users to enter Tax Type and Register Number , if users’ companies are tax-registered.
e. Queue Number
☑️ this setting to enable queue number to be printed on each receipt.
f. Paper Saving Mode
☑️ this setting to remove empty lines on each receipt.
☑️ this setting to print product barcode below product name in sales receipt.
☑️ this setting to merge modifier with set menu separator.
☑️ this setting to hide “No Service Charge” Text.
g. Company Info
Allow users to enter company information such as address or contact number.
h. Header
Allow users to enter a header which will be printed before the Outlet Name on the receipt.
i. Footer
Allow users to enter a footnote which will be printed at the bottom of the receipt.
j. Footer Image Display Configuration
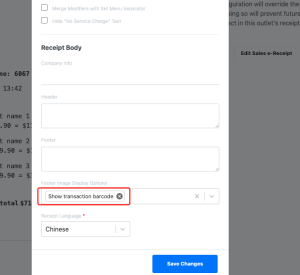
1. Allow users to customize the display of images or barcodes on thermal receipts.
Click “Edit POS Receipt”, by default, the system selects the ‘Show Transaction Barcode’ option.
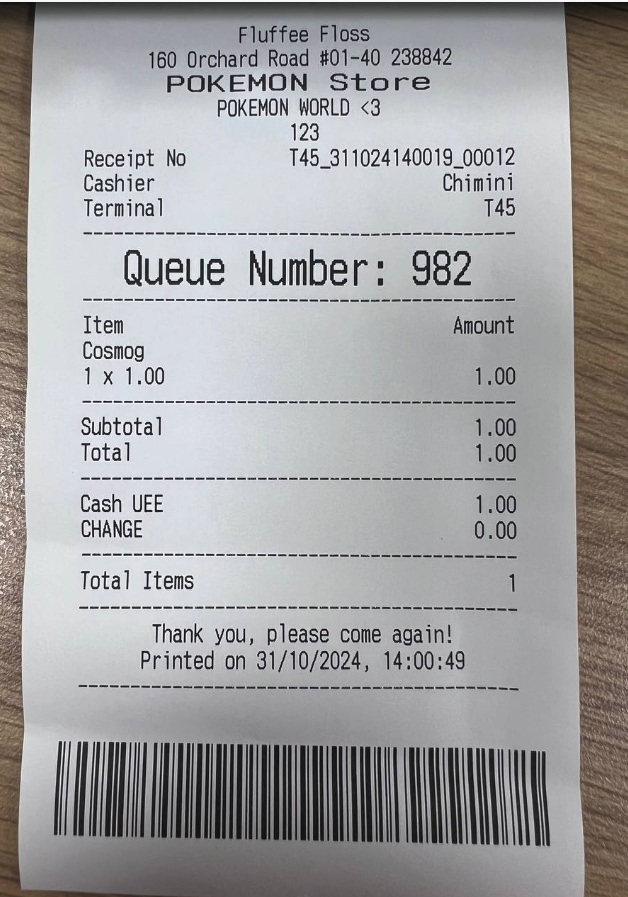
Printed example when only the barcode is selected:
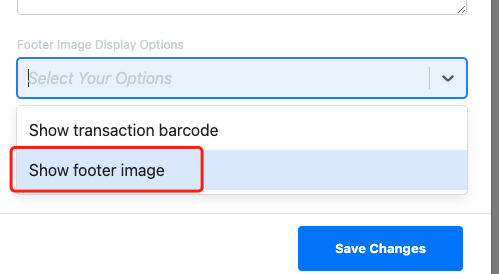
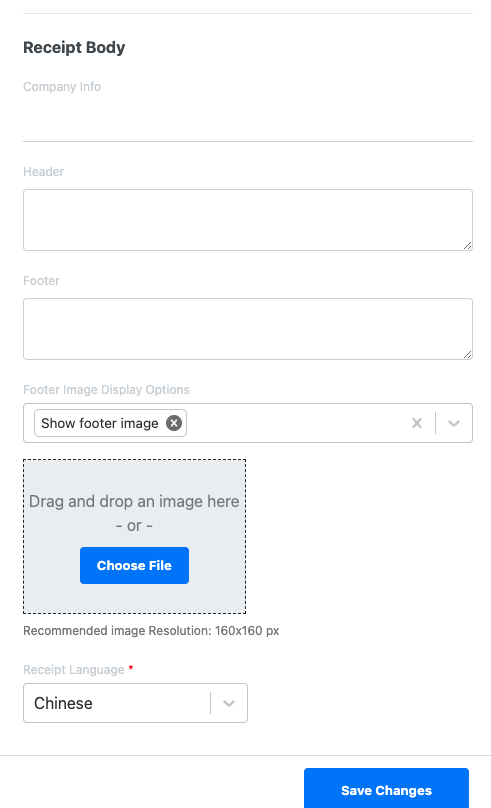
2. Users can choose to deselect this and select for ‘Show Footer Image’ to upload a footer image.
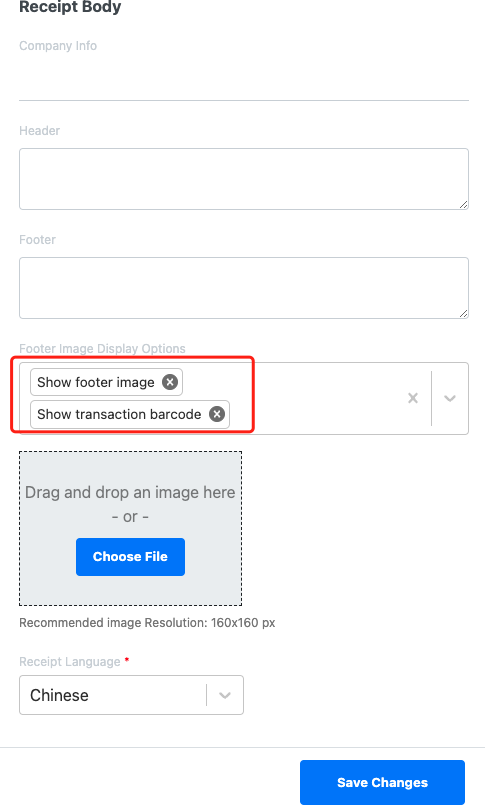
Remove the “Show Transaction Barcode” and select “Show Footer Image” & upload image. The recommended image Resolution is 160×160 px.
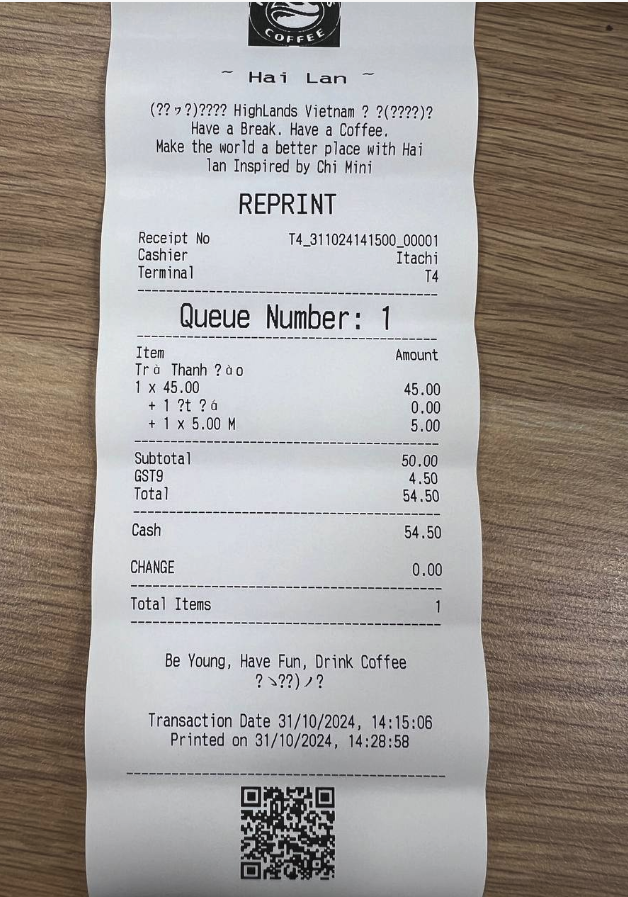
Printed example when only the image is selected:
3. Users also have the flexibility to enable both options or disable them altogether, based on the needs.
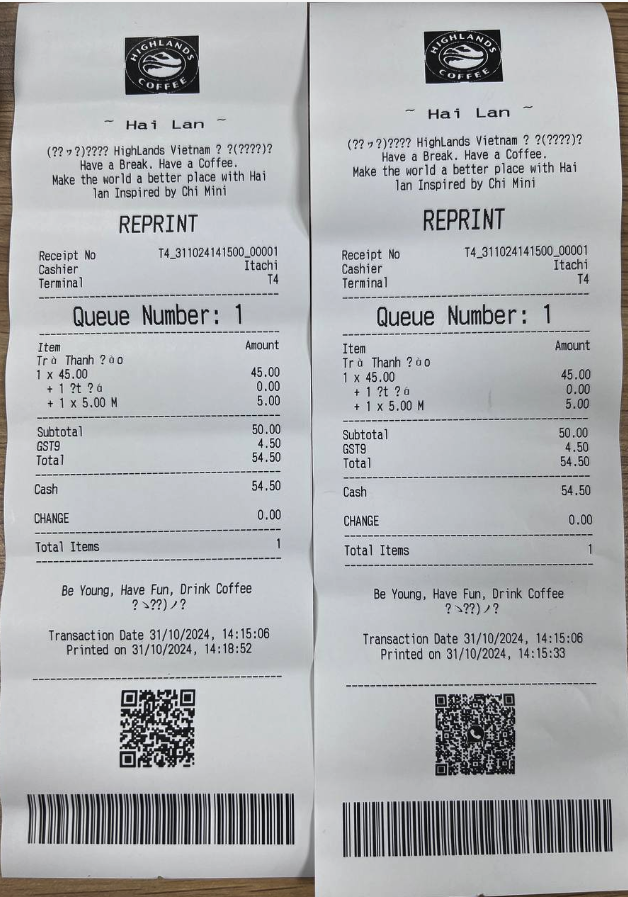
Printed example when both barcode and image are selected:
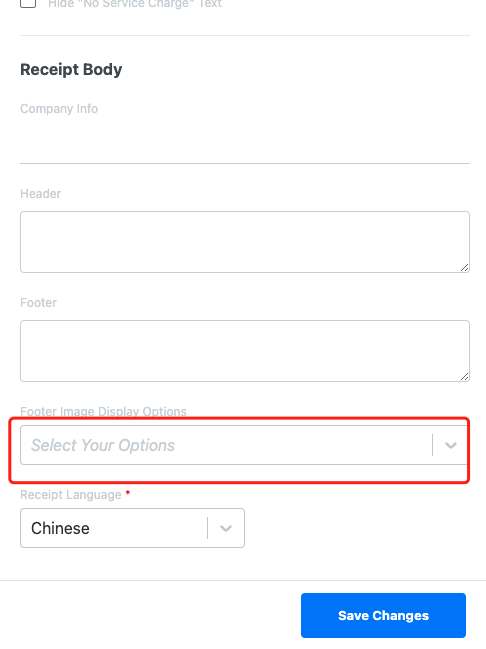
4. Users also have the flexibility to disable both options or disable them altogether, based on the needs.
Printed example when both barcode and image are not selected:
k. Receipt Language
Allow users to select the second language to be supported by the receipt printing.
l. Save Changes
Click on Save Changes once done.
Was this article helpful?
YesNo
