No products in the cart.
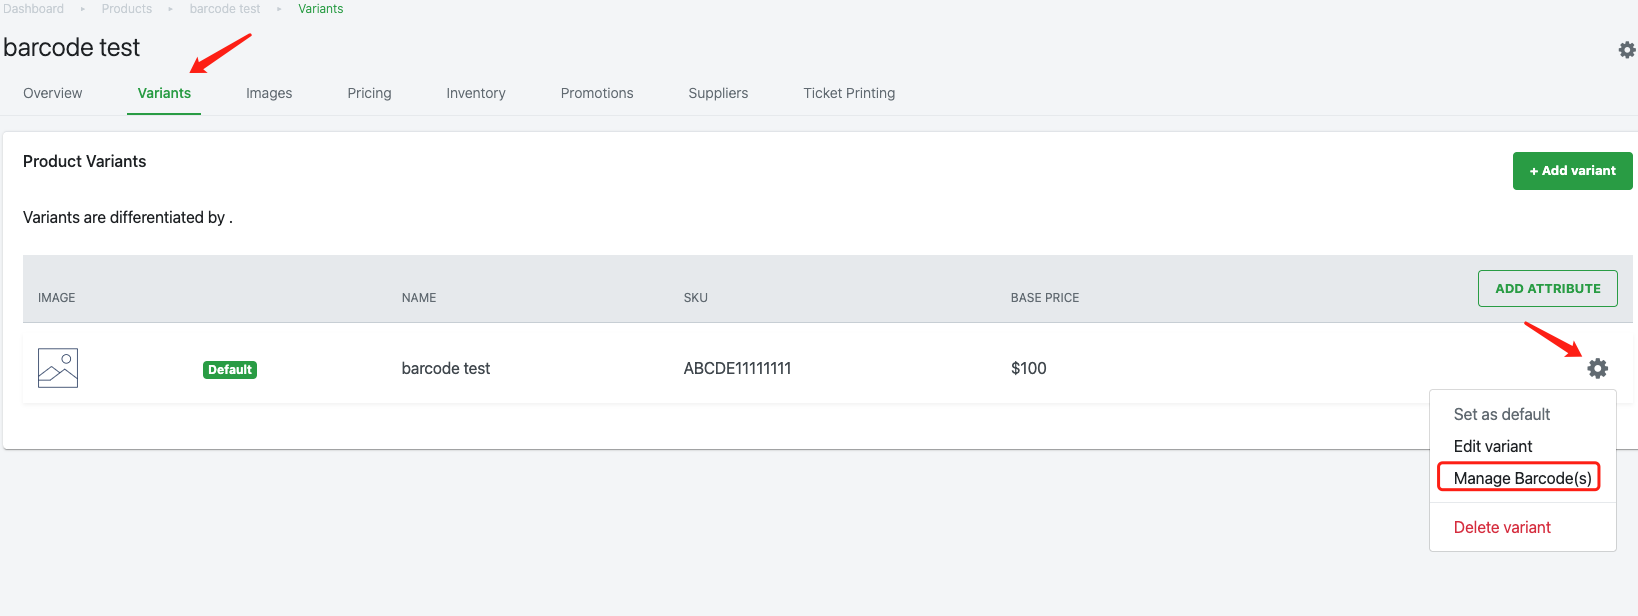
0. Go to the “Manage Barcode(s)” Page
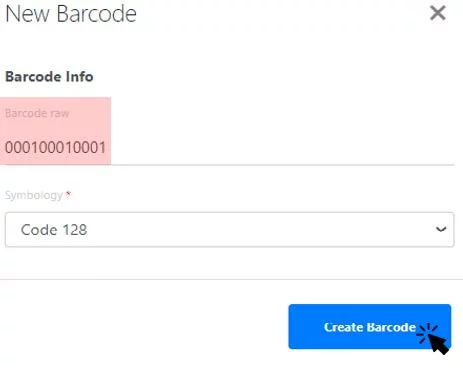
1. If a variant does not have any barcode, click on Add another Barcode.
2. A pop up window will appear.
Enter barcode accordingly.
Click on Create Barcode once done.
3. Once the barcode is created, users will then be directed to the Barcode window.

a. Edit
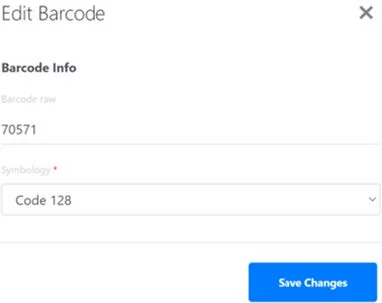
- Barcode raw: Enter Barcode.
- Symbology: Choose Code 128.
- Click on Save Changes once done.
b. Delete
Deletes the existing barcode.
c. Print
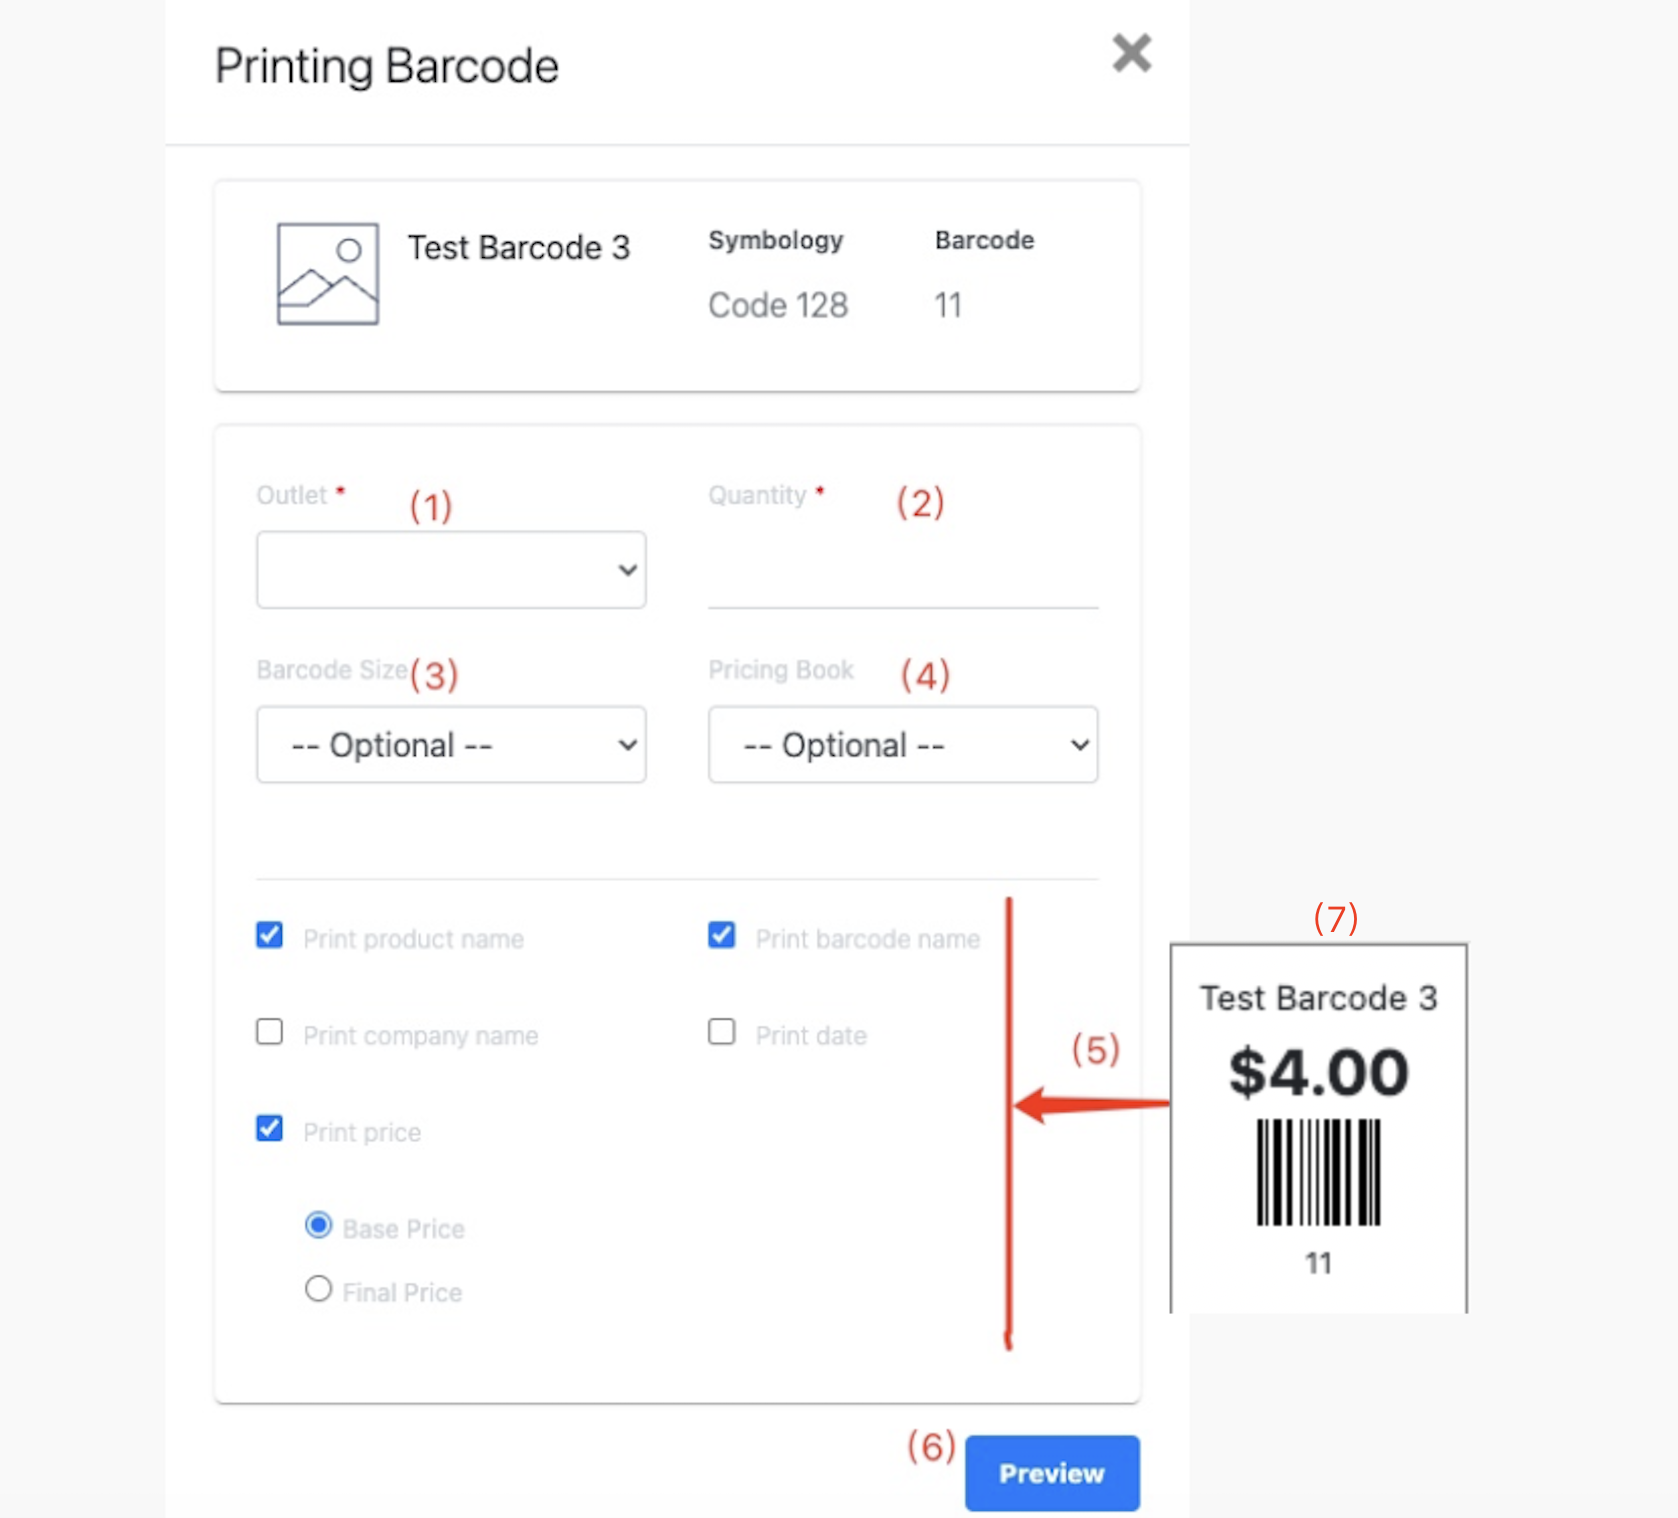
1. Select Outlet.
2. Enter the quantity of barcodes to be printed.
3. Choose barcode size, usually 50x30mm.
4. Select Pricing Book. For more information, see Price Books.
5. ☑️ the relevant boxes to include relevant information to be printed on the barcode.
6. For “Print price” box, you have 2 options: Base Price & Final Price
a. When you select “Base Price”, here’s an example:
For a $100 (based price product):
If the Tax is applied | Barcode Preview |
If there is NO Tax applied to this item | |
If there is Tax applied to this item ( GST Exclusive 9% , SVC 10% ) | Price on the Preview: $100 *1.09 = $109 w/GST: |
If there is Tax applied to this item ( GST Inclusive 9% ) | Price on the Preview: $100.00 w/GST |
b. When you select “Final Price”, here’s an example:
For a $100 (based price product):
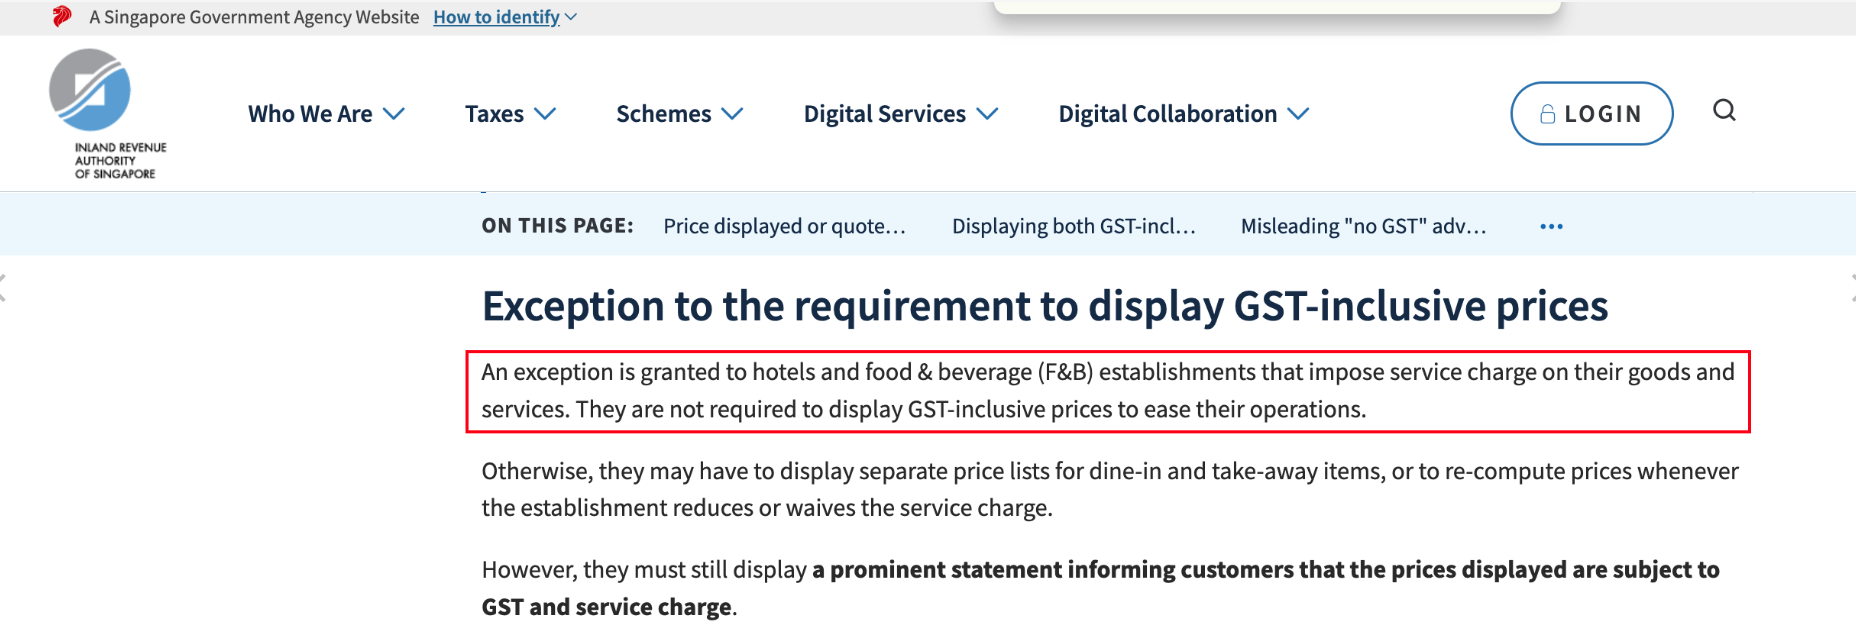
* The GST is added on the base price. The Service Charge is not included in the calculation. As can be referred here:
7. Click on Preview once done.
8. Users will be directed to a new window where the printouts will be shown.
d. Delete Variant
Removes selected variant from the backend portal.
Was this article helpful?
YesNo
