No products in the cart.
This section explains how to set up QR ordering and in-store ordering through the Web Ordering App.
First, please go to the backend, then navigate to the Setup section and select the Table Management tab.
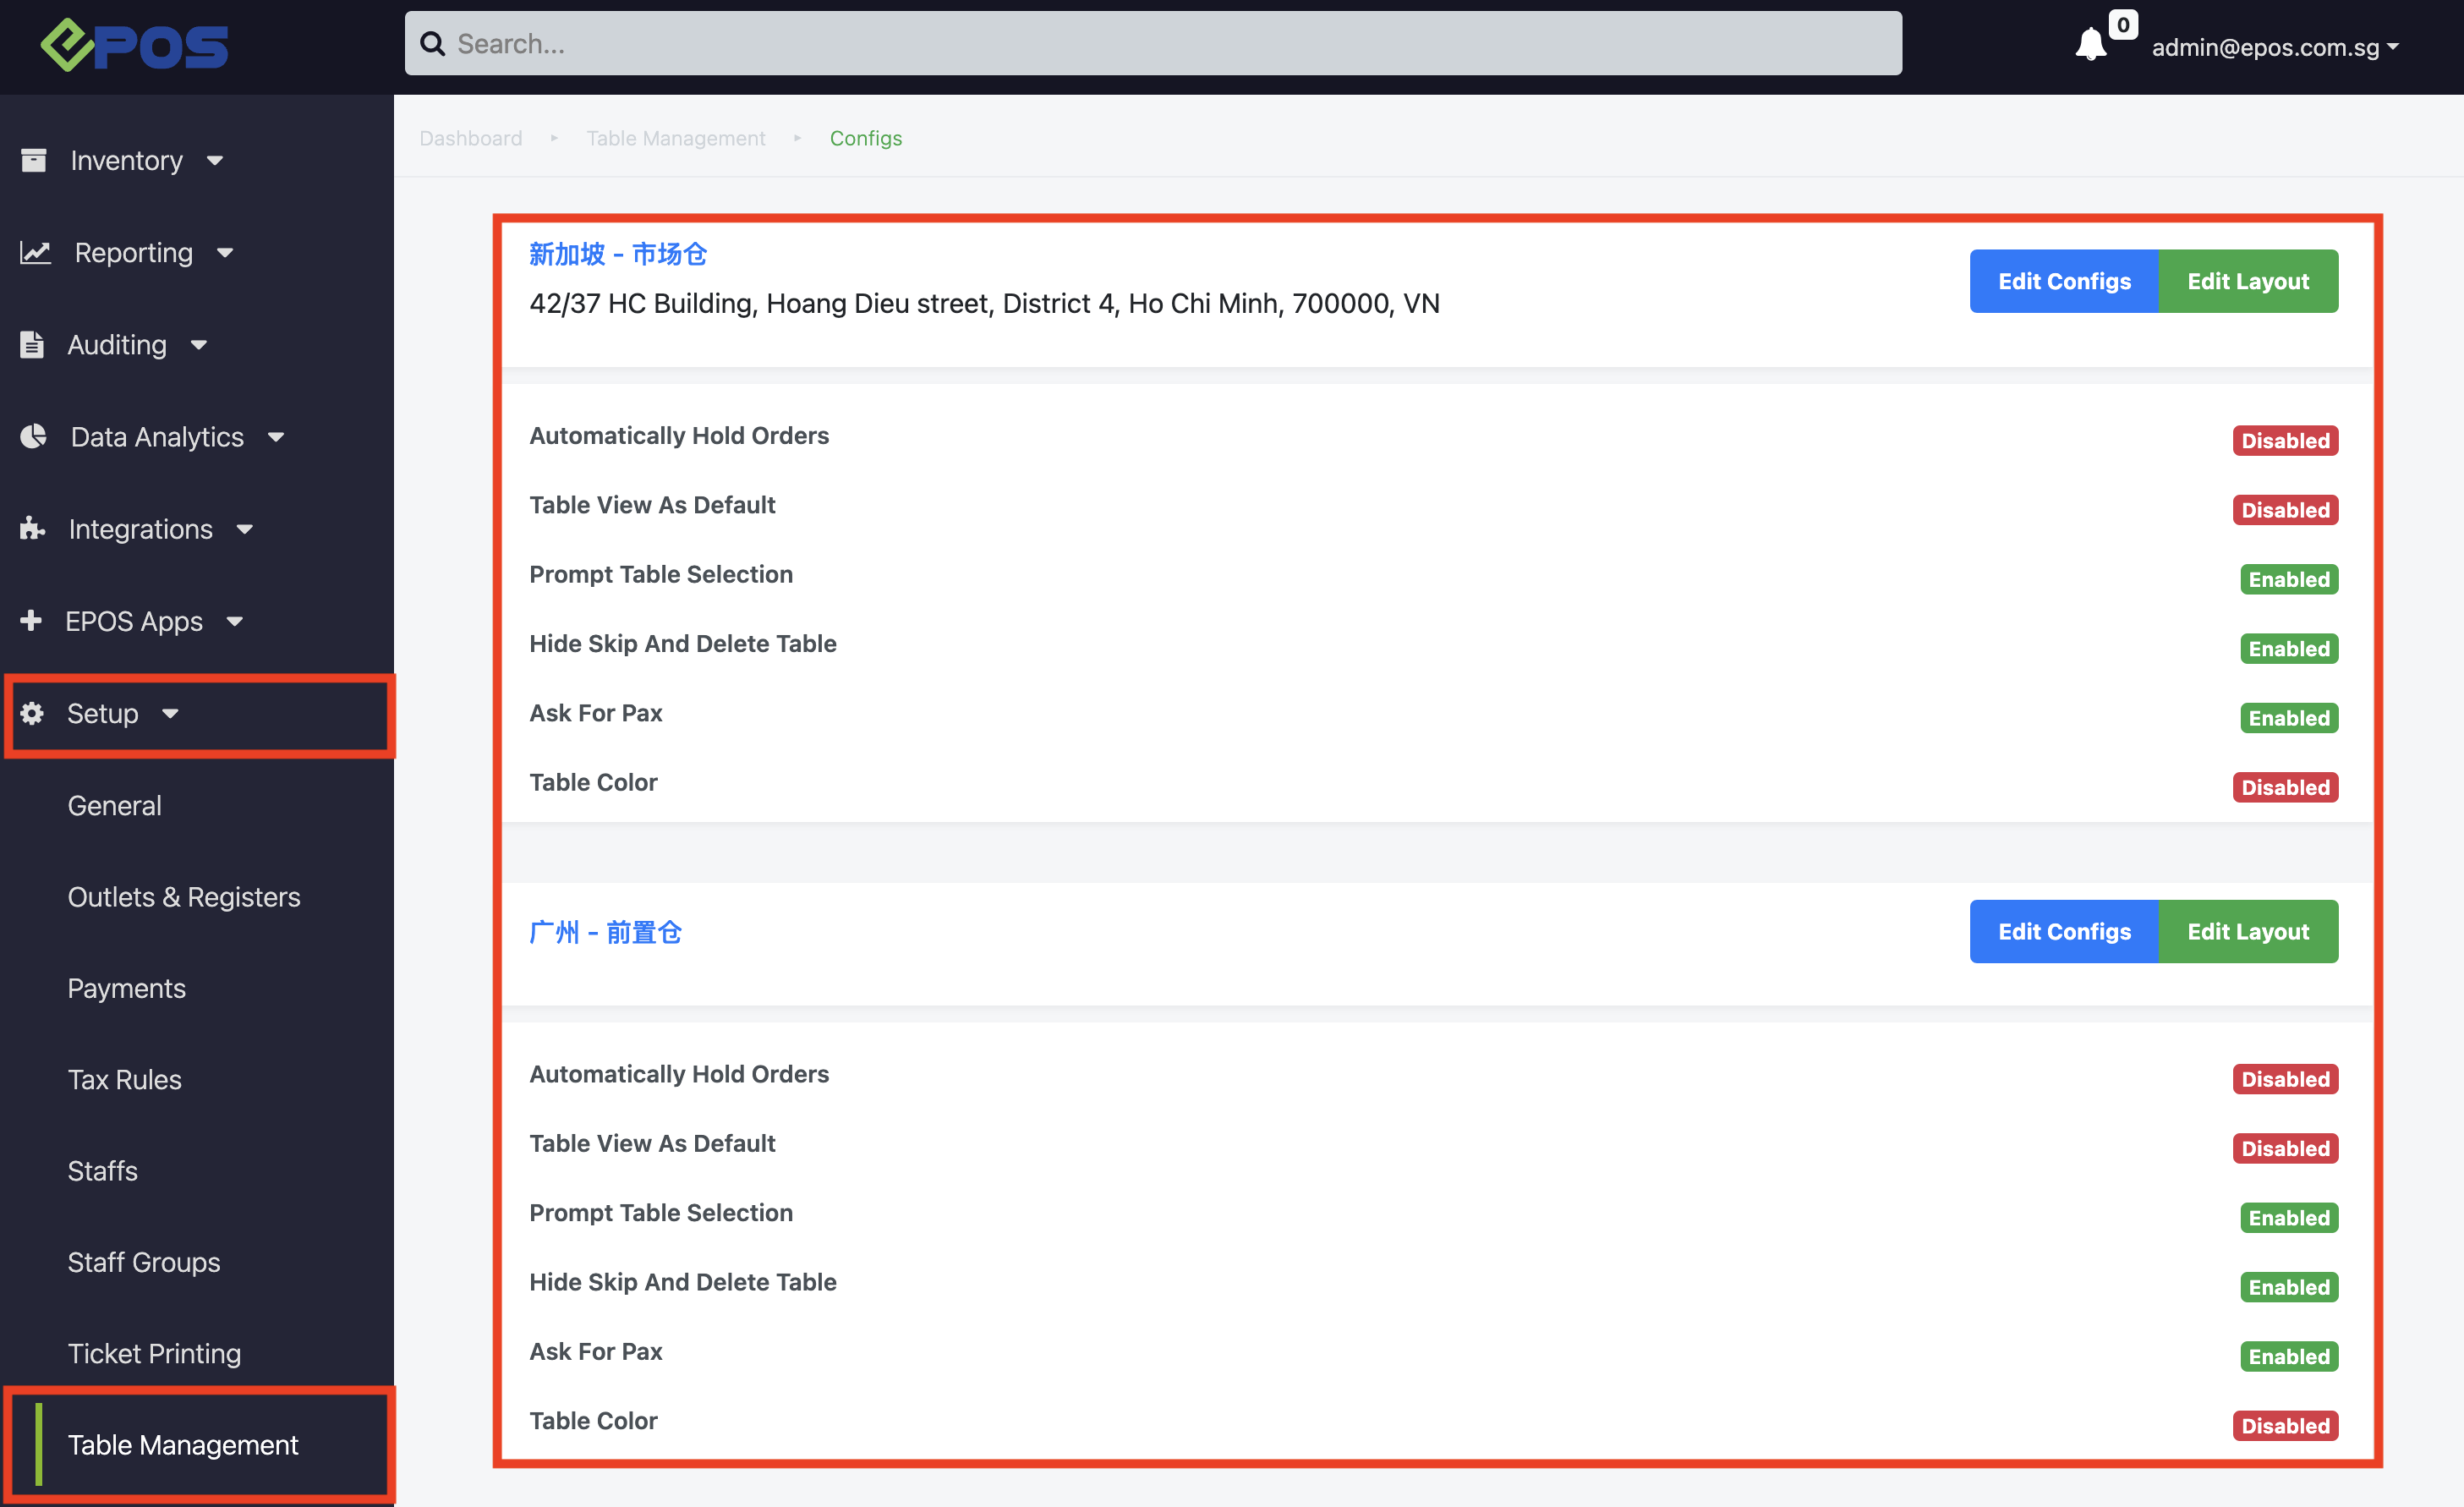
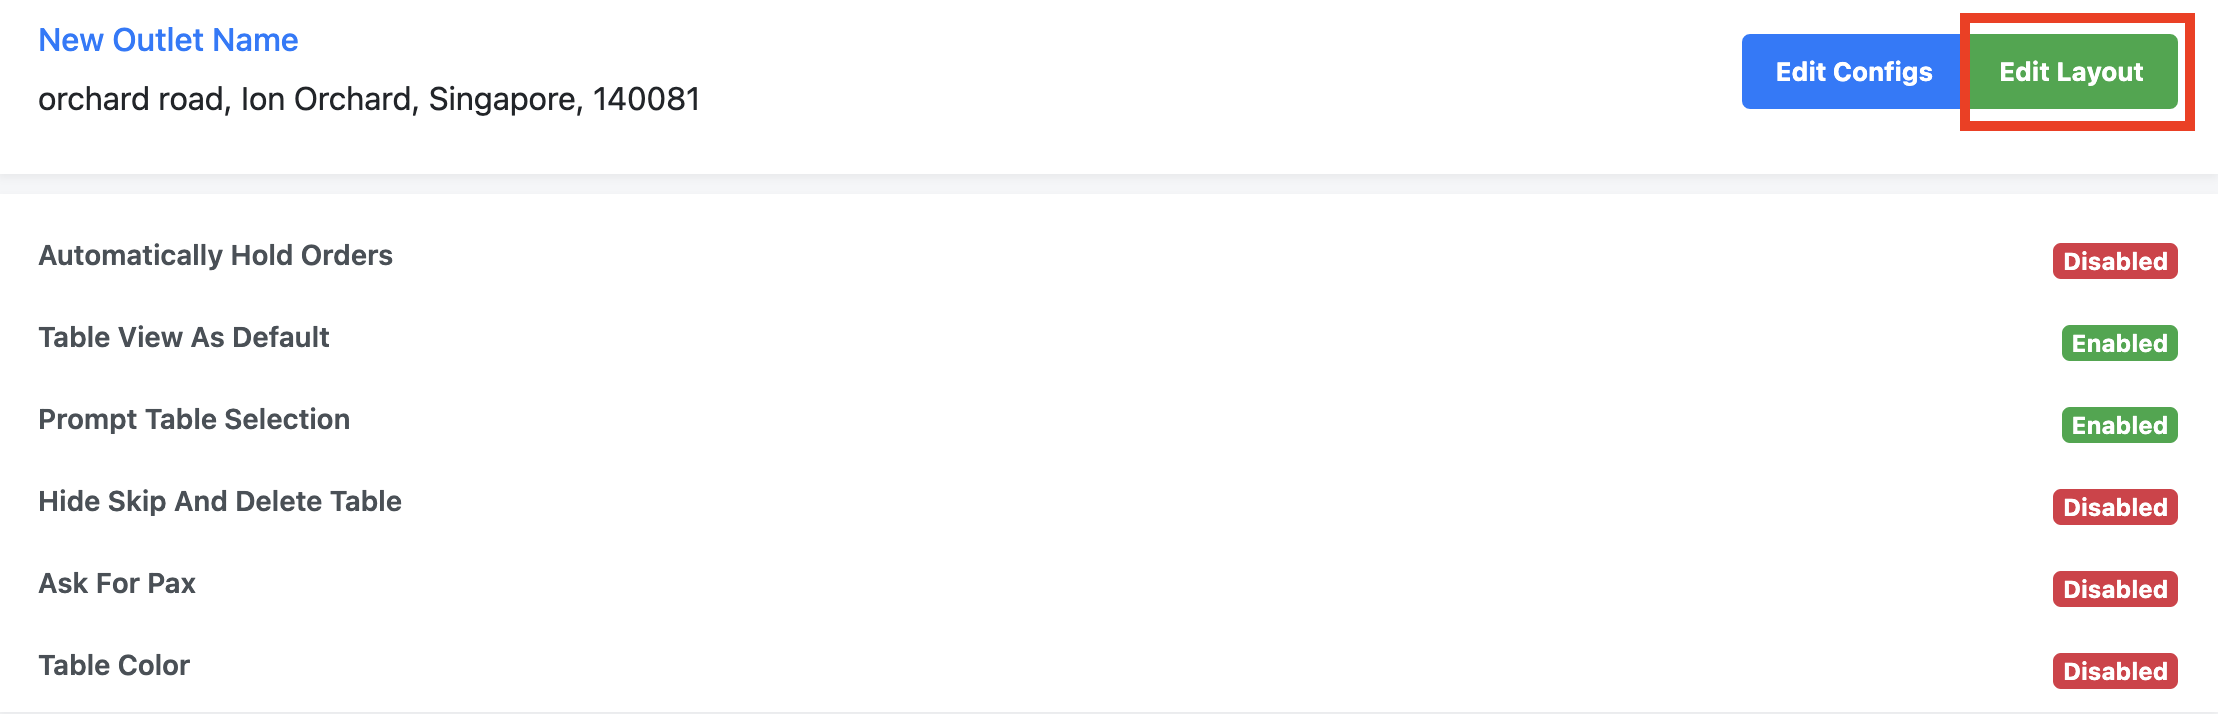
Users will then see the available outlets. To edit your preferred outlet, choose the outlet and click “Edit Layout.”
Note: This section covers how to set up QR ordering and in-store ordering. To learn more about the features of table management, please click the link here.
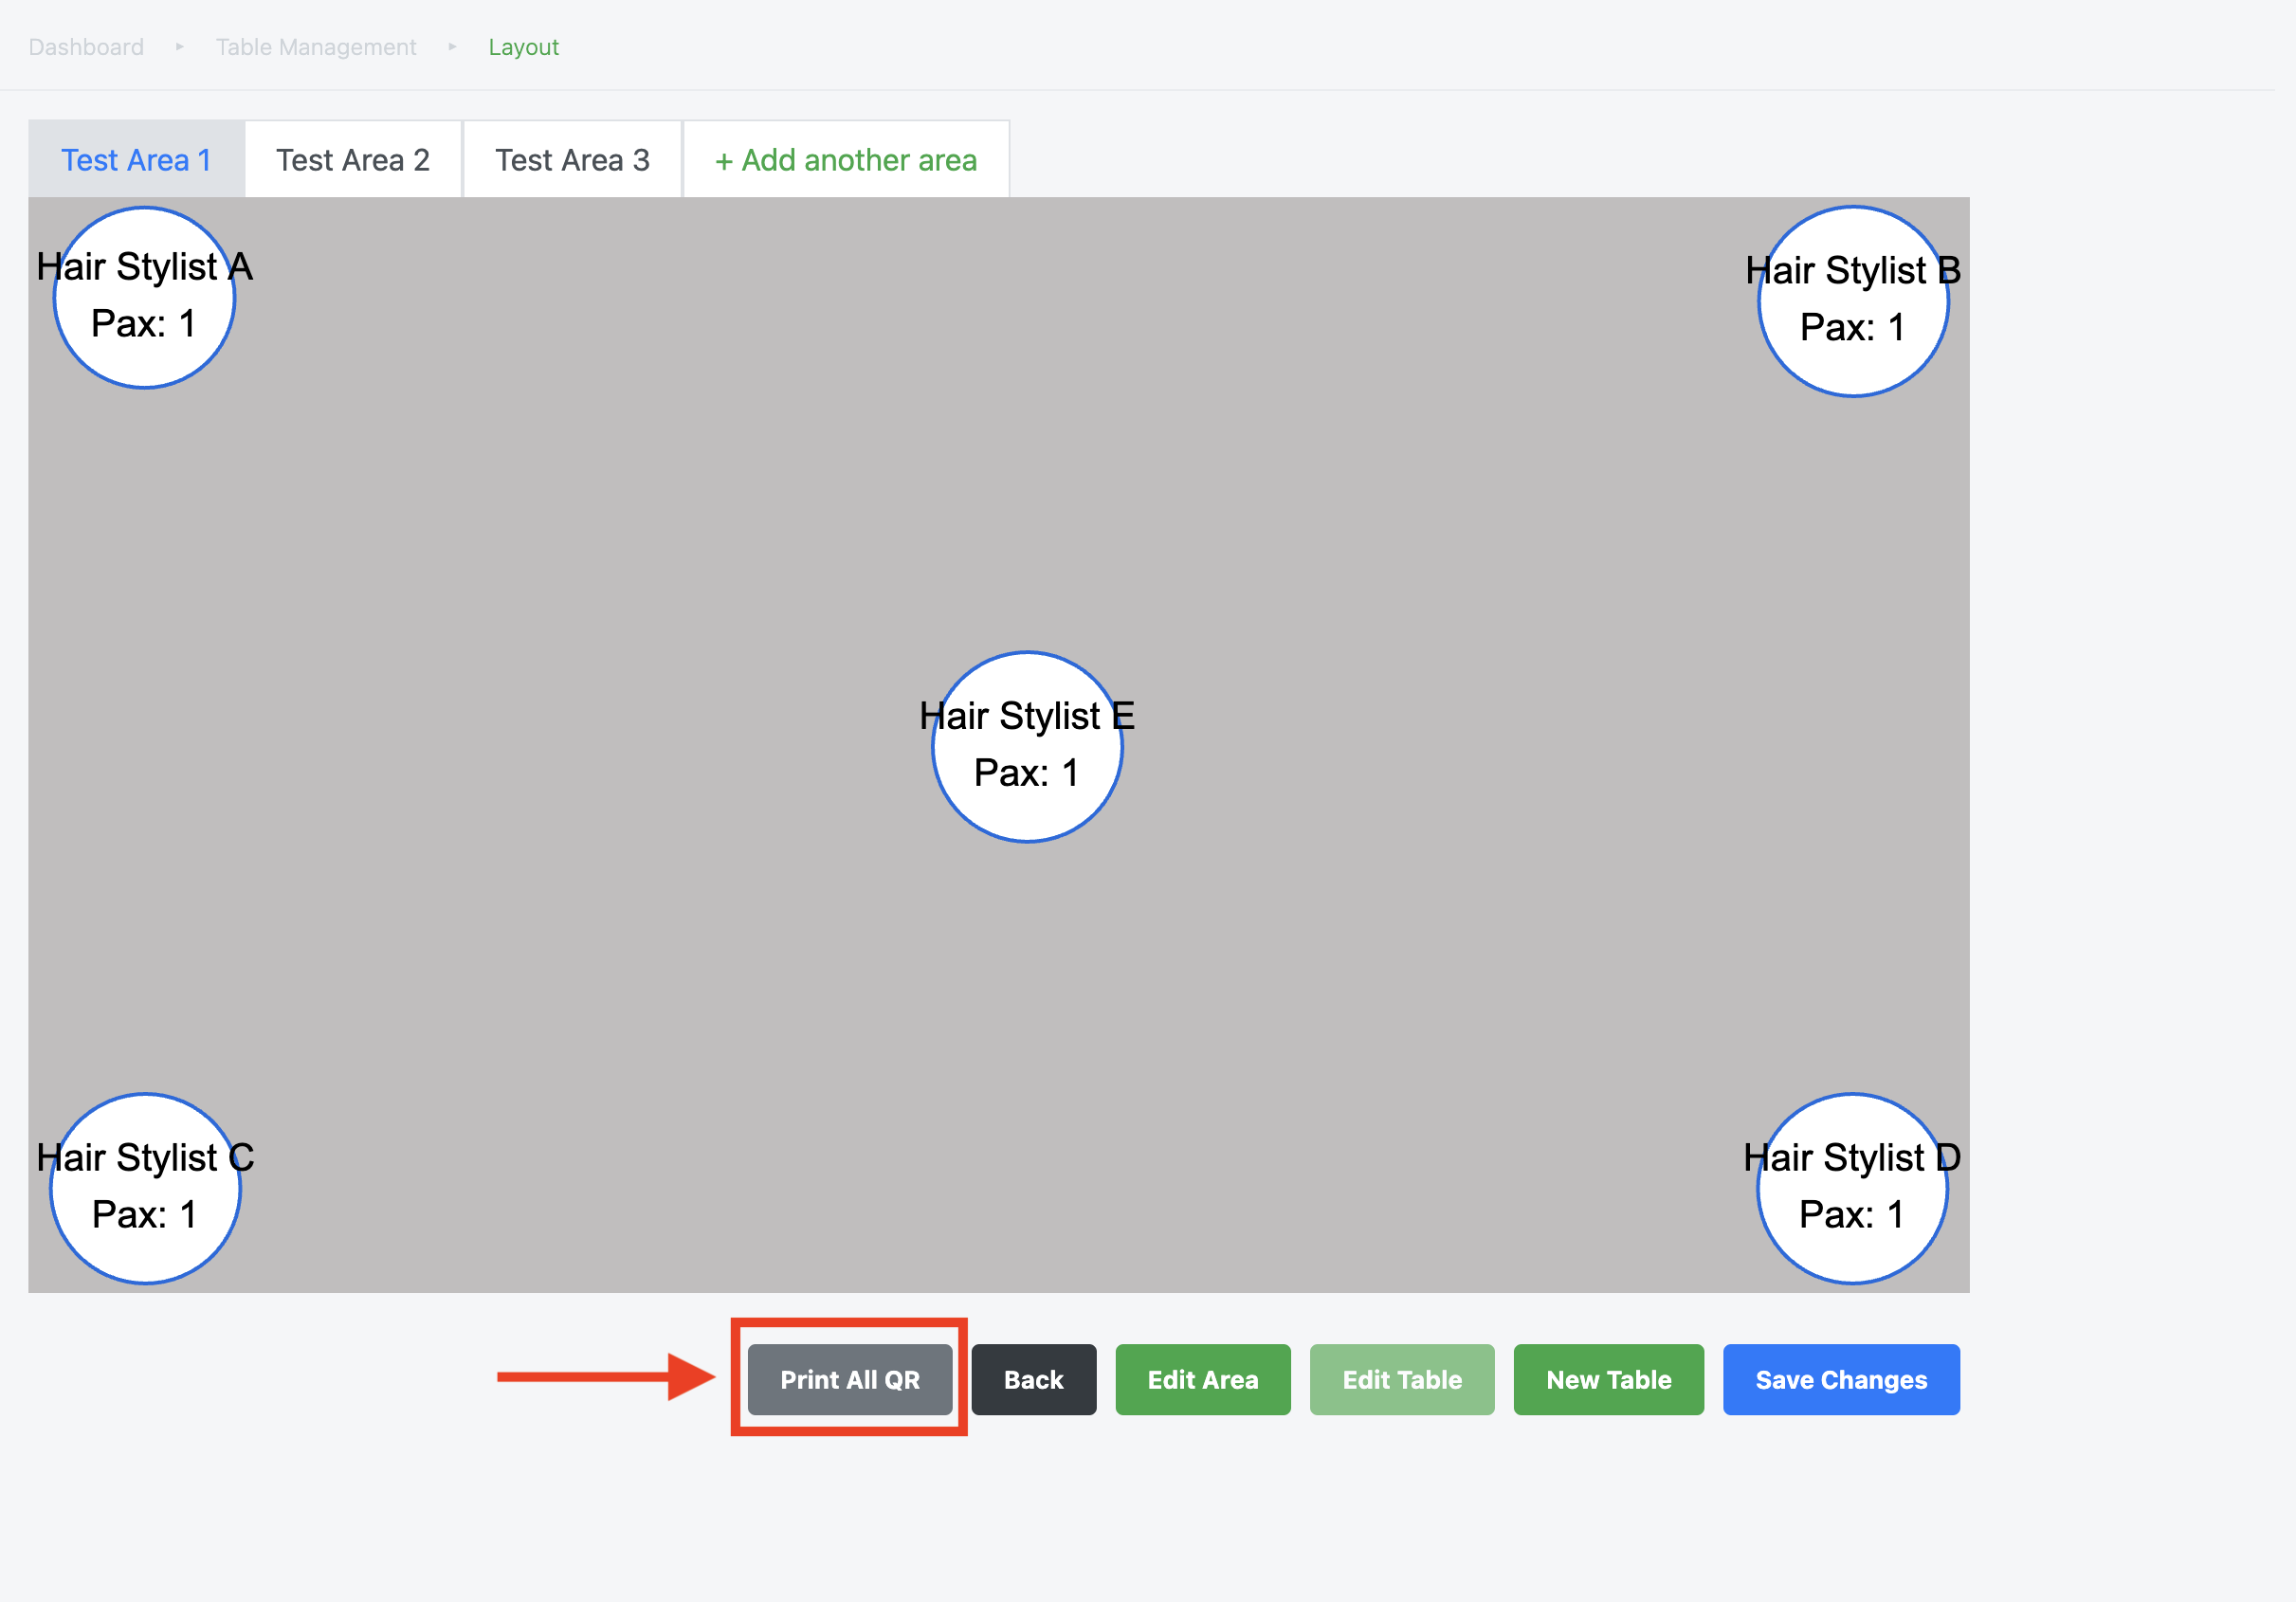
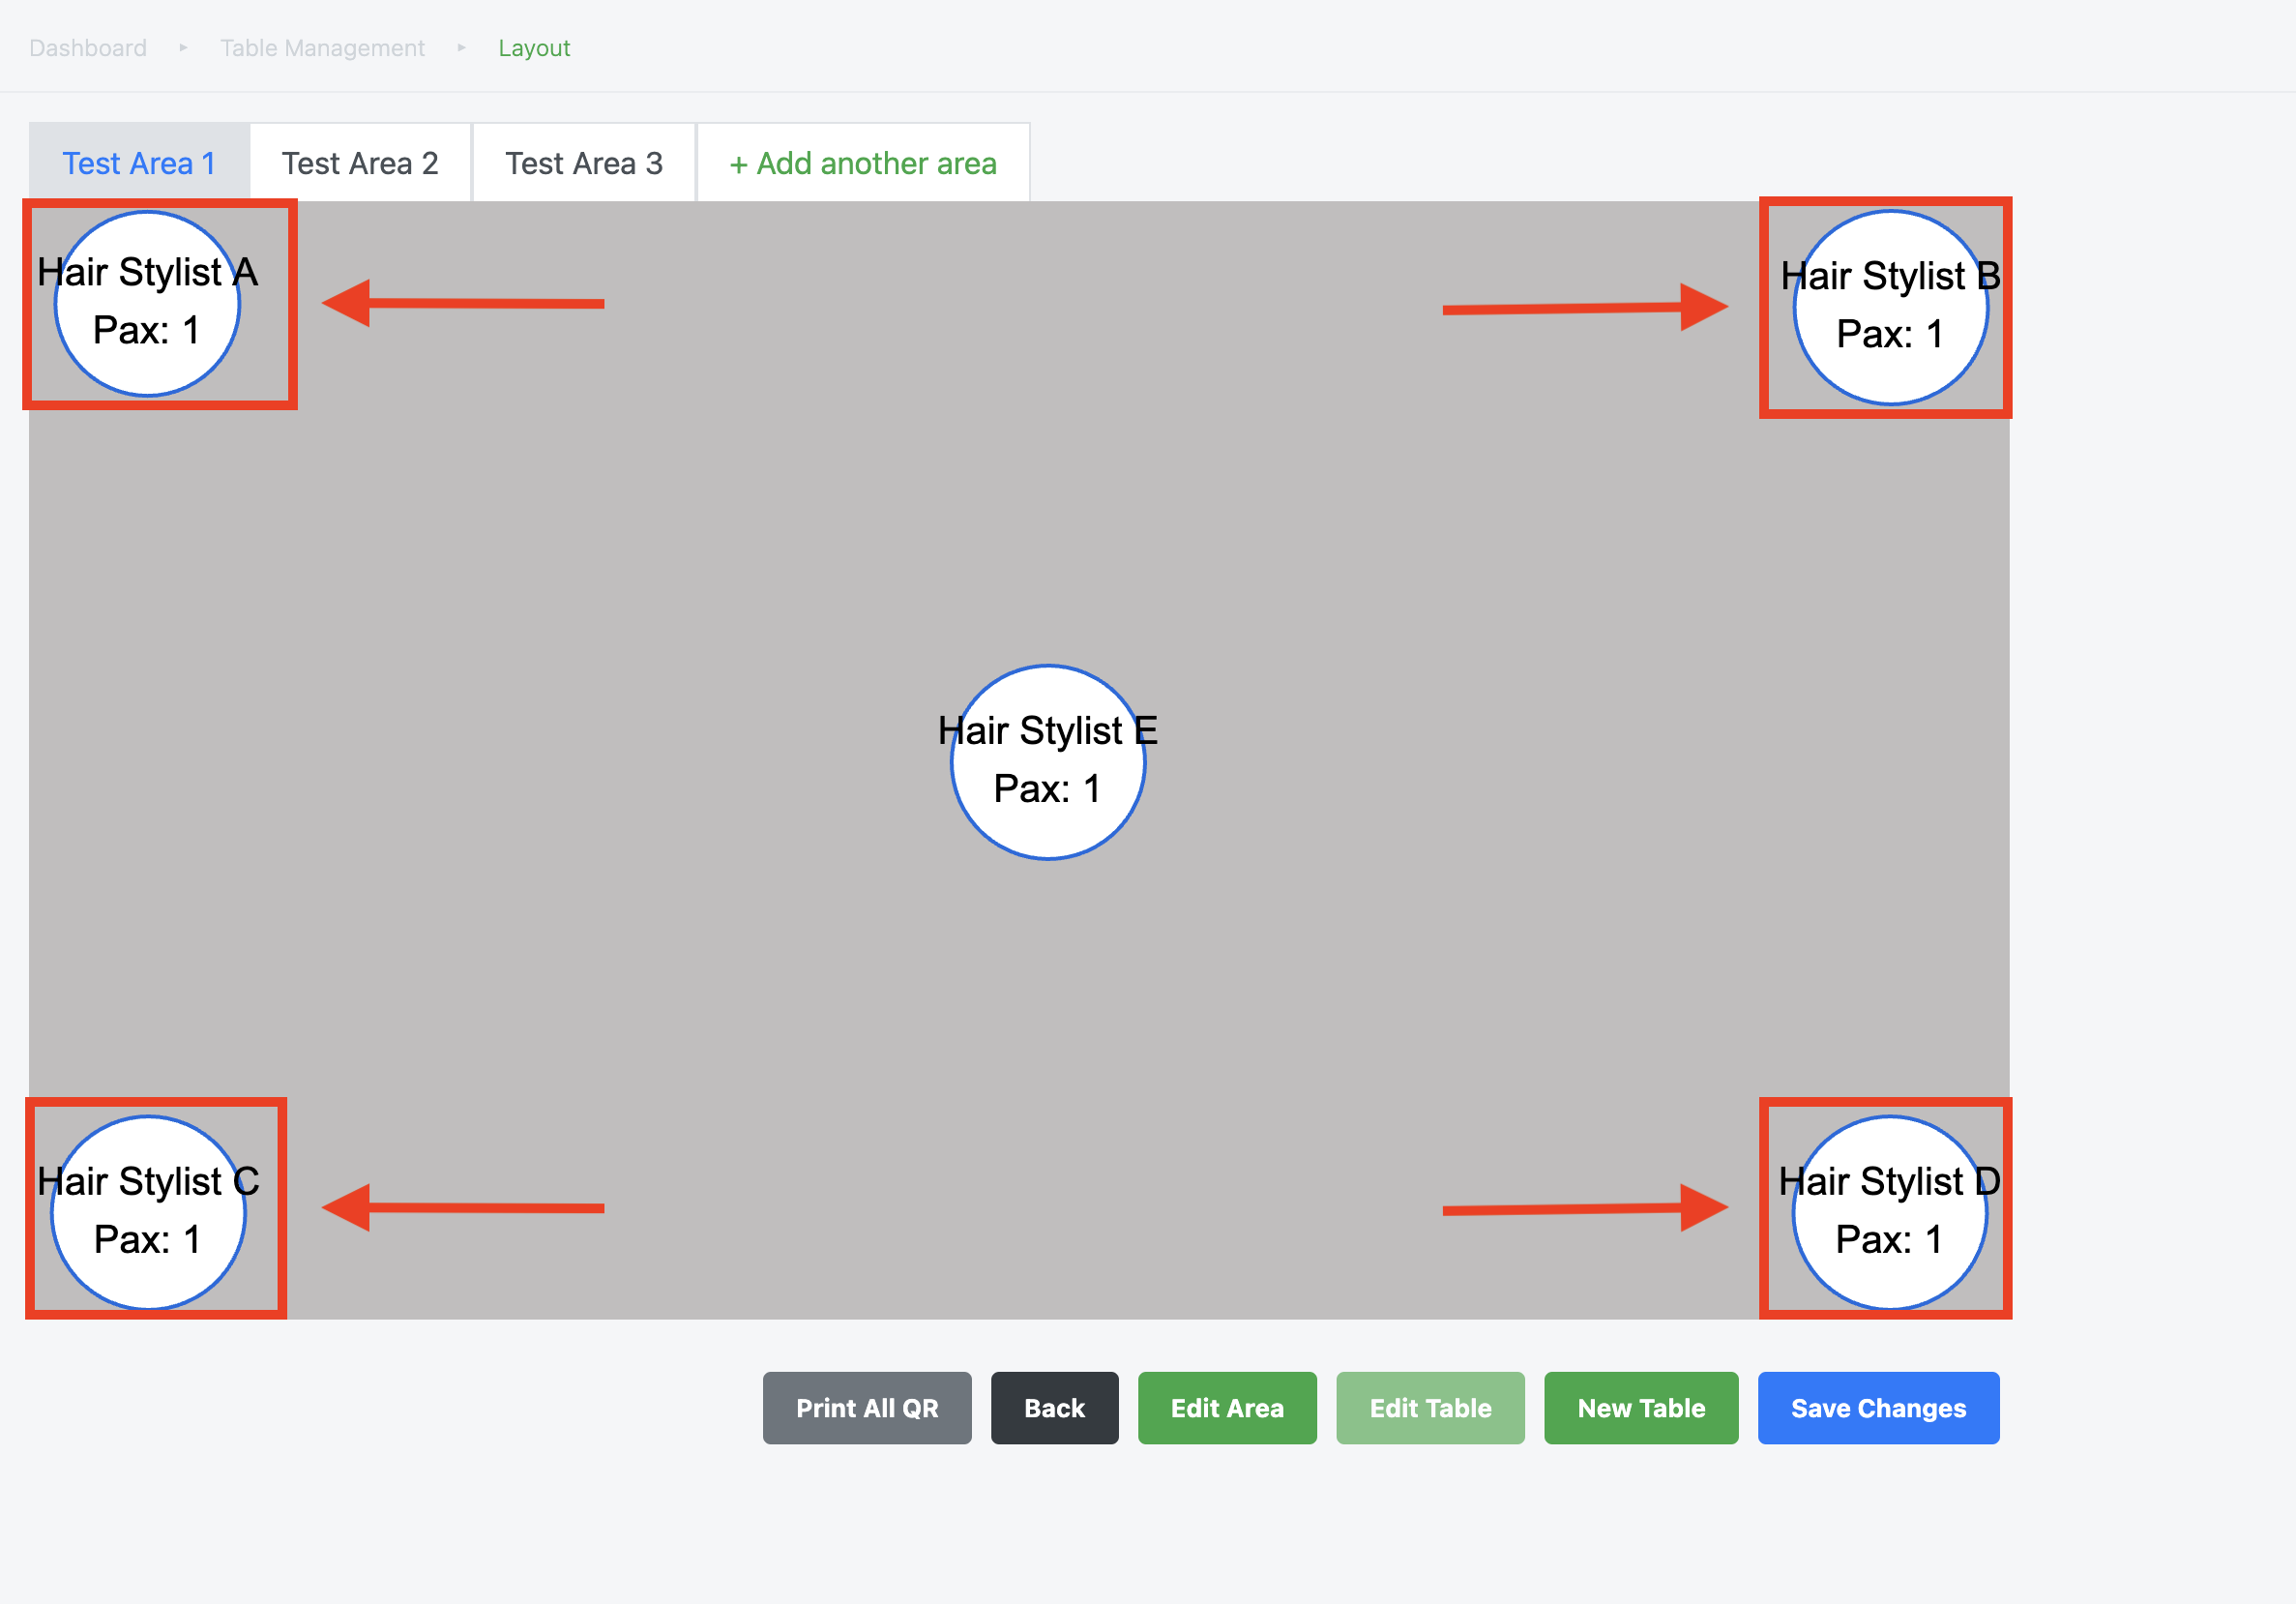
Afterward, users will be taken to a new display showing the layout of the selected outlet area.
Users can then choose to print QR codes for all the tables by clicking “Print All QR Codes,” as highlighted below.
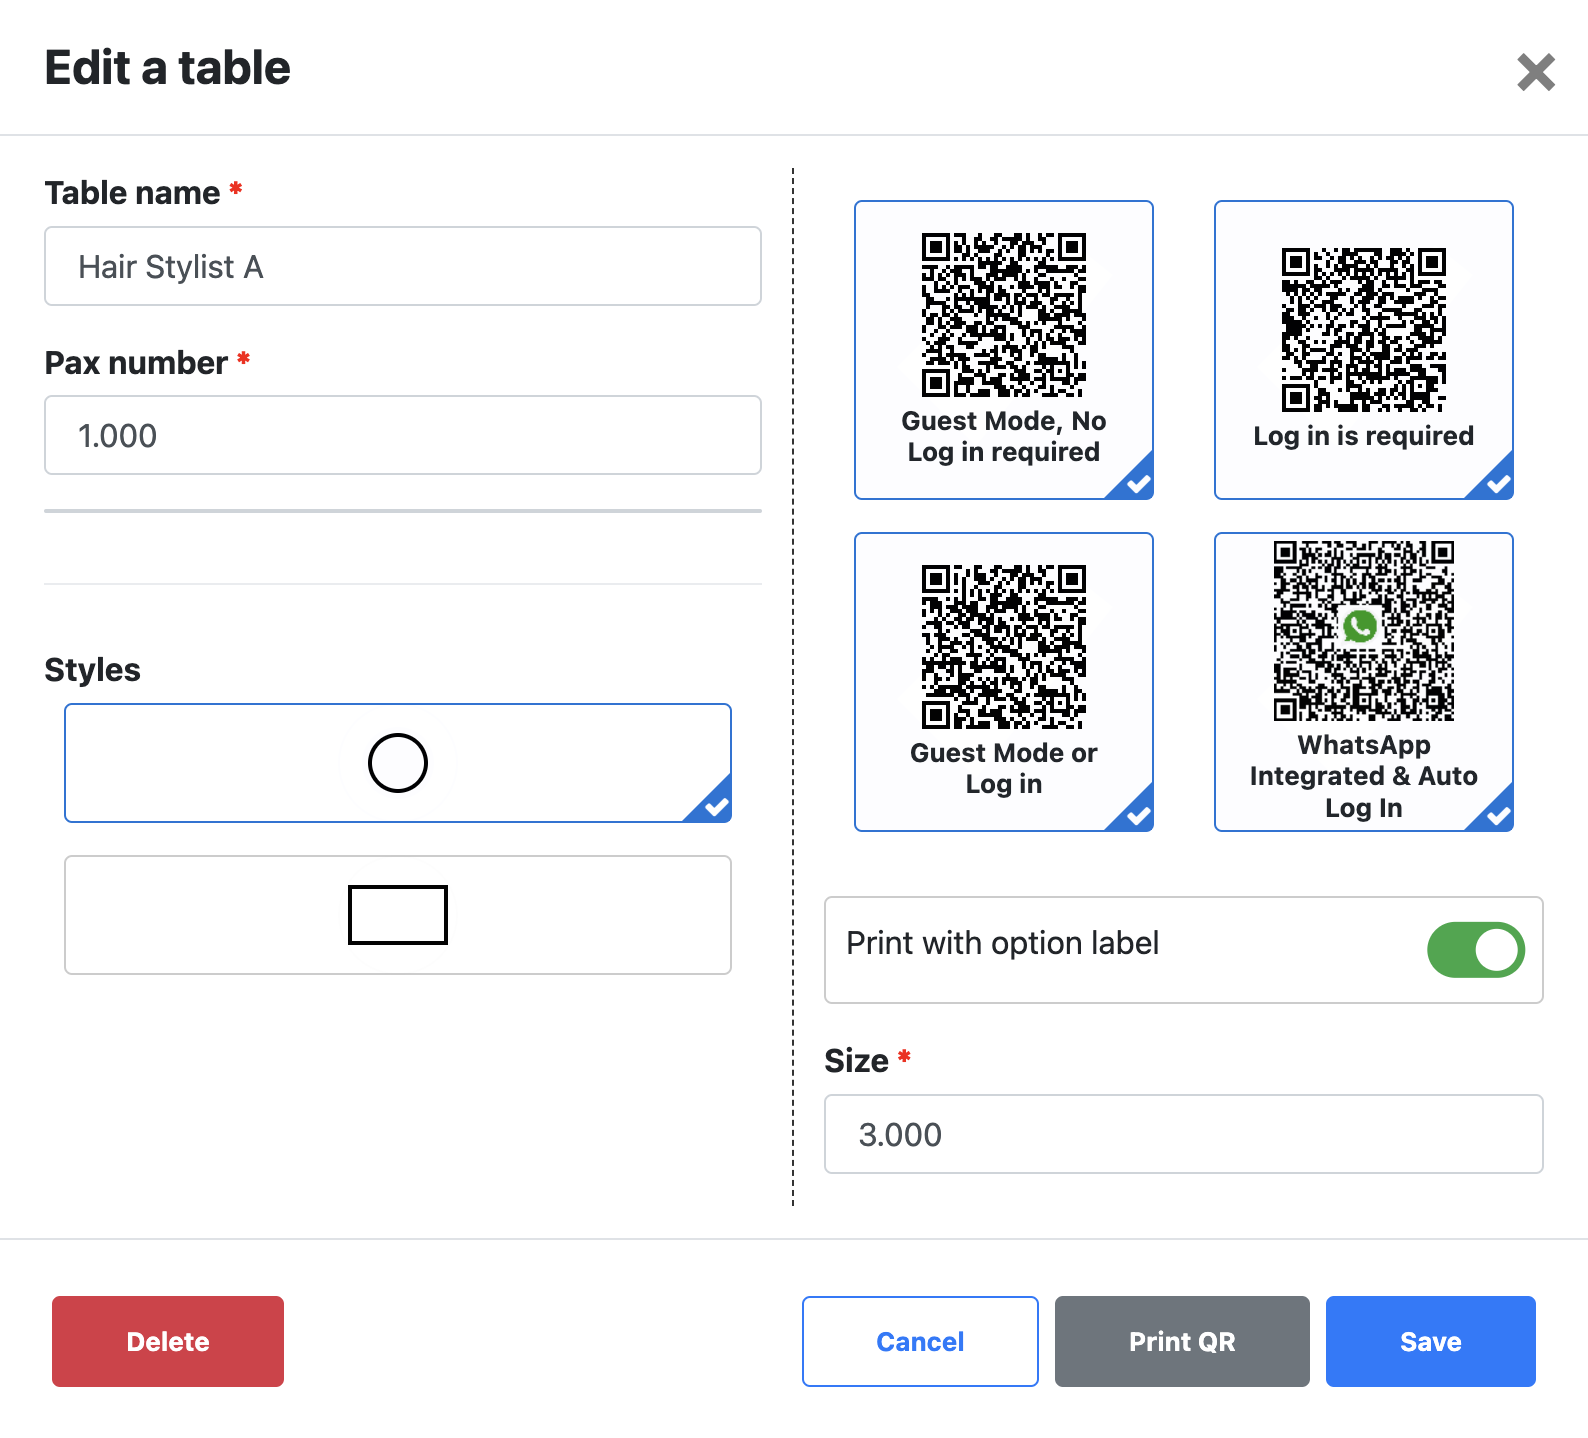
A new display will show the available options for QR codes:
This window allows you to select the type of QR codes you want to print for your customers.
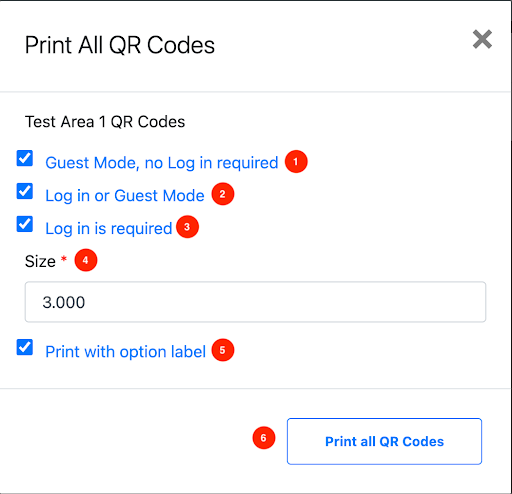
- Customers can order through the QR code and access the web app without needing to log in first.
- Allows customers to decide whether to log in to their account to place an order or use guest mode to order without logging in.
- Customers must log in to place orders through the web app.
- Decide the size of the QR code for printing
- Determines whether the QR code will include a label indicating if login is required, not required, or optional for placing orders.
Note: Guest Mode means Login is not required for customers to place orders
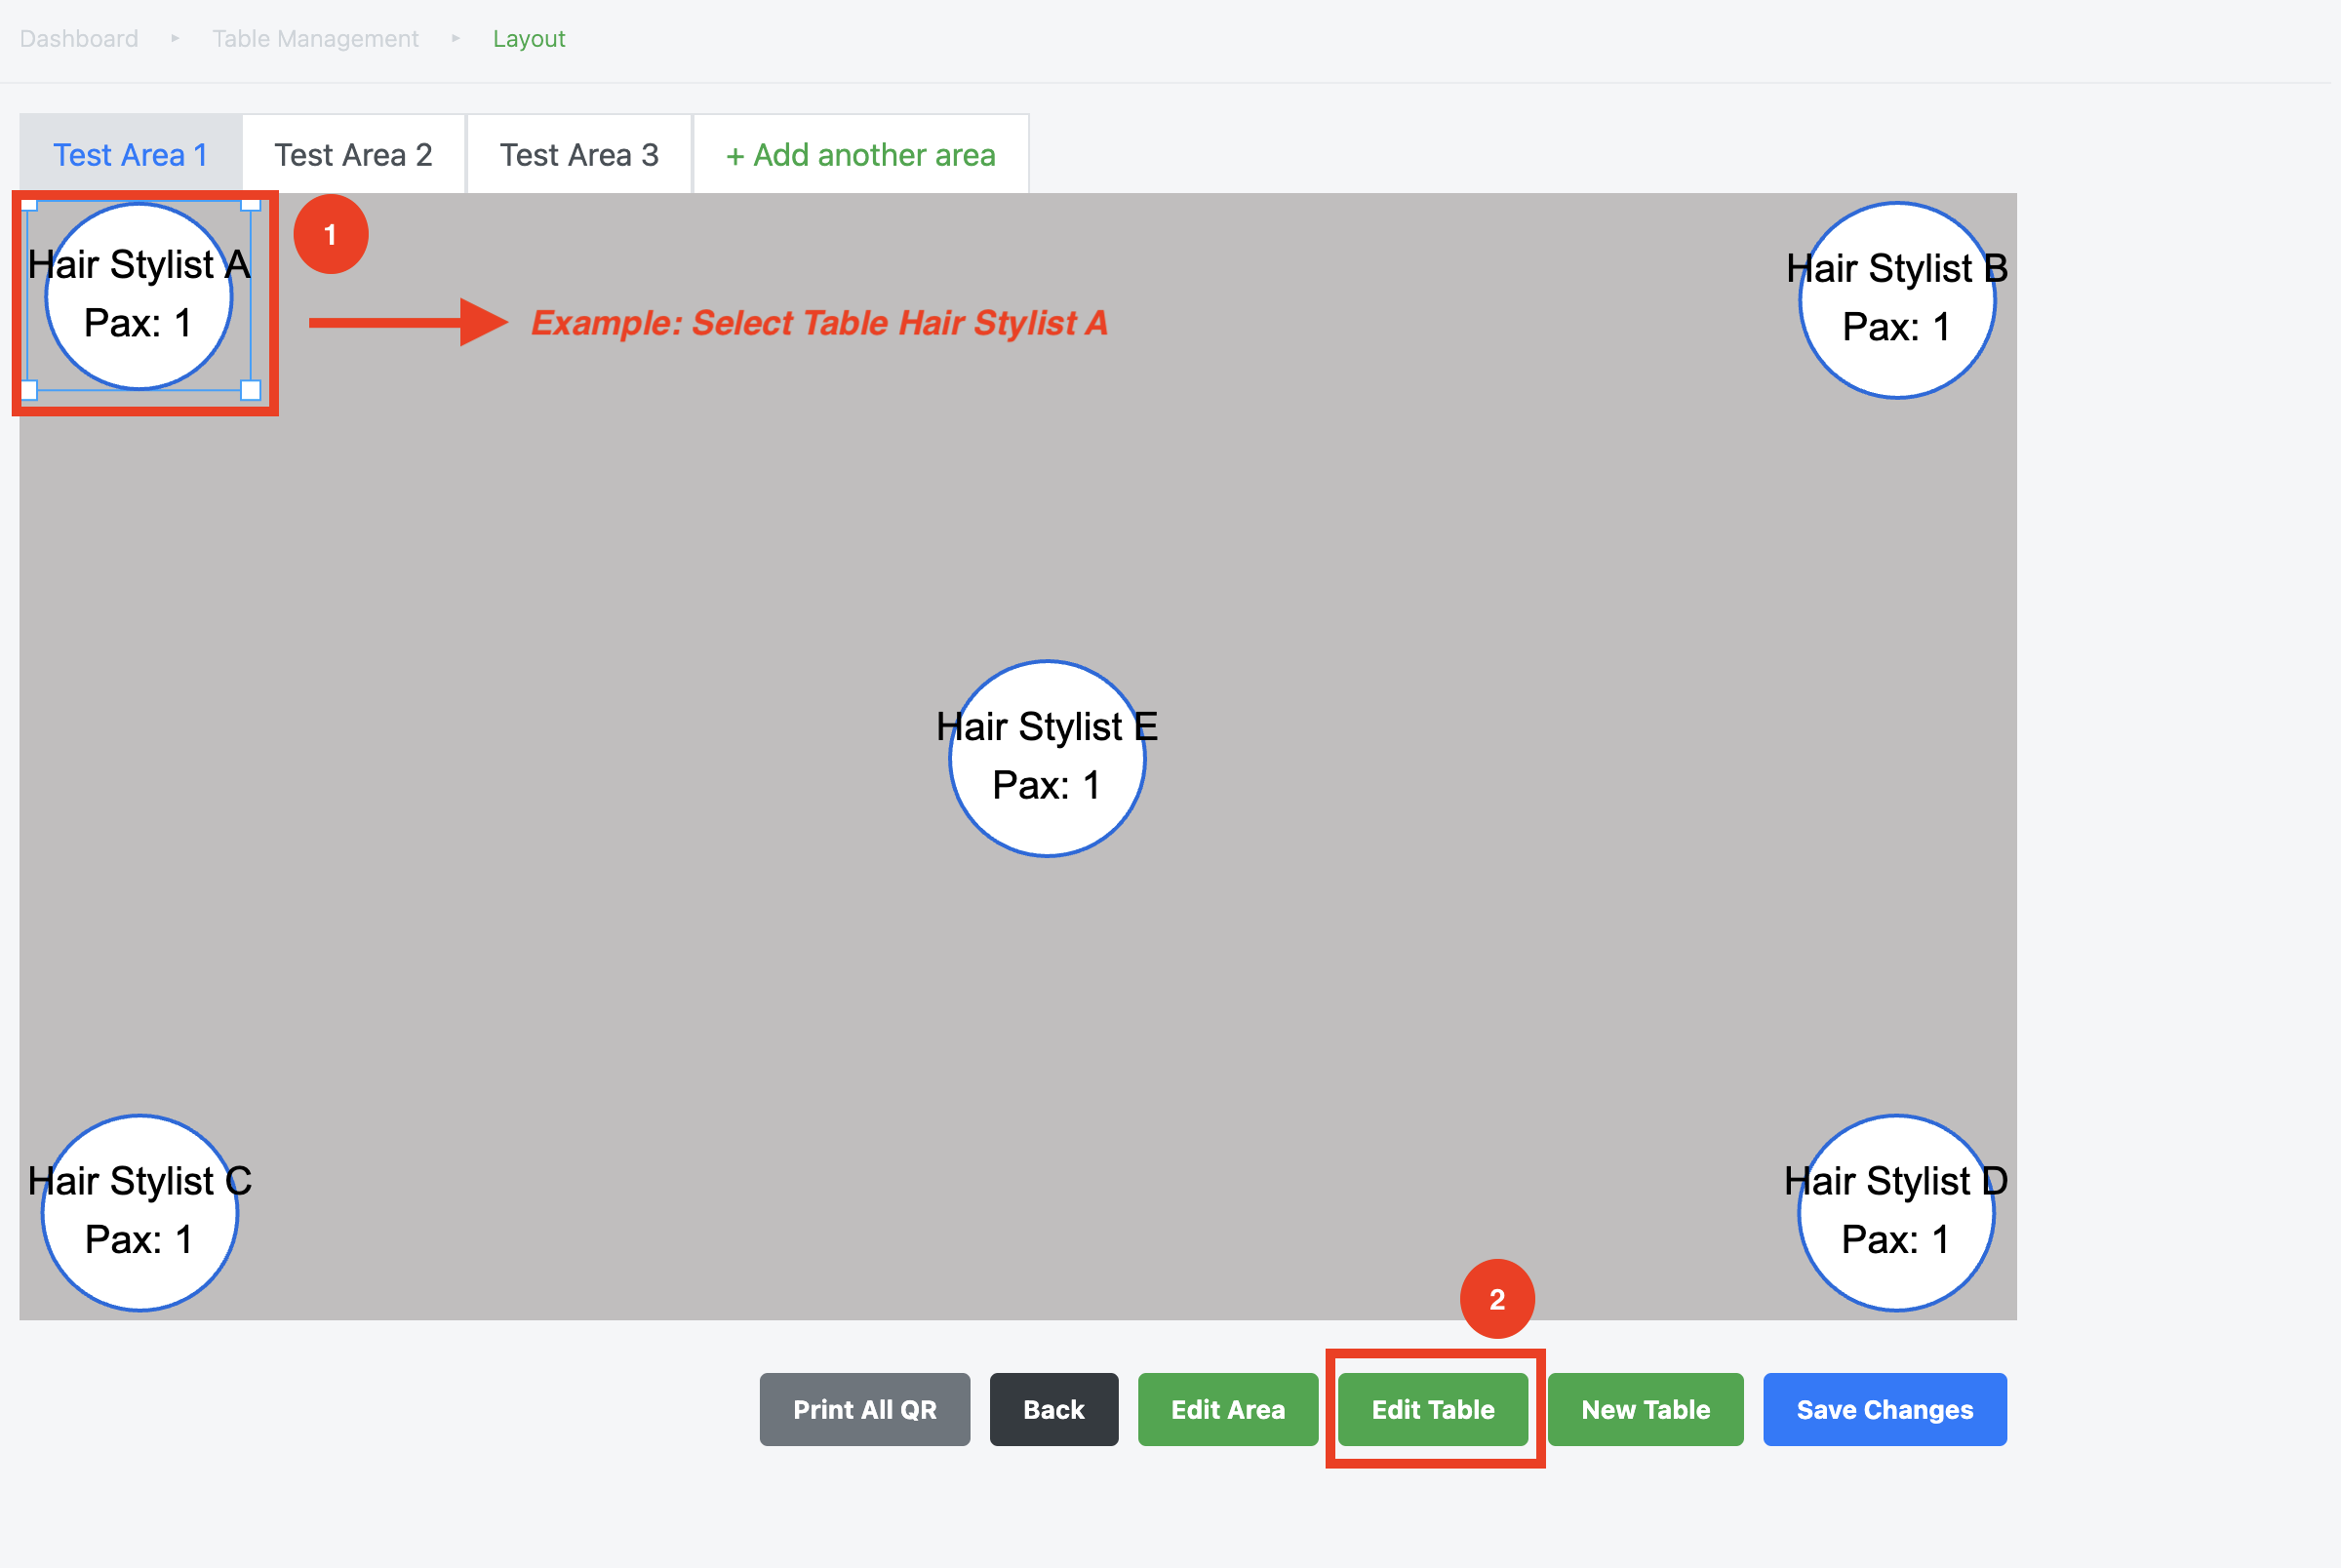
However, users also have the option to print QR codes for specific tables instead of printing for all tables.
To do this, simply select your preferred table.
Then please proceed to click on the edit table button as shown below:
Users will then be taken to the display. Please select your desired options as explained previously and proceed to print the QR code.
Note: Users can choose to have customer orders via Web App to be sent to the POS for cashier confirmation first or directly to the kitchen printer. Refer to the configuration tab for setup.