No products in the cart.
October 2024
This October, several features across our POS, Backend, and Web Ordering App have implemented features to enhance the experience of both the users and customers.
What’s New
Not sure which affects you?
These icons indicate which group of users is impacted by each enhancement: Point of Sale (POS) users, Backend users, or Web Ordering App users.
( 🖥️ POS — ⚙️ Backend —📱 Web Ordering App —🤖 Android POS —👨🍳 Kitchen Display System (KDS))
(Backend) Stock Snapshot Report (formerly Daily Stock Movement Report) - Added date filters⚙️
The Daily Stock Movement Report has been enhanced and renamed to Stock Snapshot Report. Users can now apply date filters to view and consolidate monthly stock movements for all SKUs, removing the need to manually compile daily reports.
Follow the steps to apply the date filters:
Navigates to Reporting > Stock Report > Stock Snapshot Report
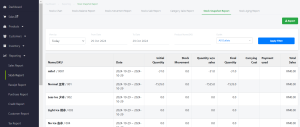
Clicks on “View by” filter to choose desired filter dates > SKUs are displayed in the table with the relevant information based on desired filter dates.
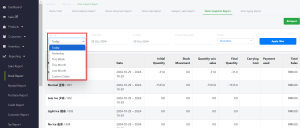
User Click “Export” to download a CSV file containing filtered data based on the selected dates.
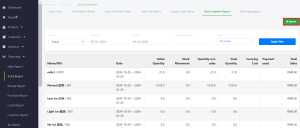
All SKUs’ monthly stock movement can be viewed and consolidated based on date filters. Customer does not have to manually consolidate daily reports to get a desired compiled view anymore.
(Backend/POS) New configuration to show or hide Transaction Barcode on thermal receipt ⚙️🖥️
Users can now choose whether a transaction barcode is printed on POS receipts using a new multi-selection dropdown in the backend system. This update helps prevent customer confusion and reduces paper waste by hiding unnecessary barcodes.
1.User navigates to Setup>Outlet & Register>Outlet>Configuration>Receipt template>Edit POS Receipt.
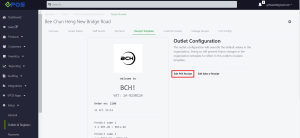
2. User scroll to the ‘Footer Image Display Option’.
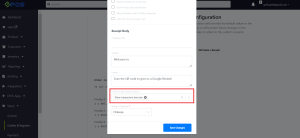
3. ‘Show Transaction Barcode’ is selected by default, user may deselect this option if they do not want the barcode to be printed.
(Backend/POS) New configuration to show, upload or hide footer image on thermal receipt ⚙️🖥️
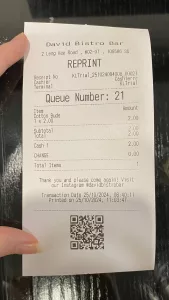
Users can now choose whether a footer image is printed on POS receipts using a new multi-selection dropdown in the backend system. This update allows printing QR code/ footer image on thermal receipt.
1. User navigates to Setup > Outlet & Register > Outlet > Configuration > Receipt Template > Edit POS Receipt.

2. In the Footer Image Display Options dropdown, select “Show Footer Image”. Click Choose File to upload an image, confirm the image by clicking Save Changes.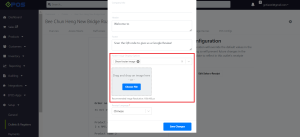
3. The uploaded footer image will now be printed at the bottom of the receipt.
(POS) Customer - Add reload button on customer search page 🖥️
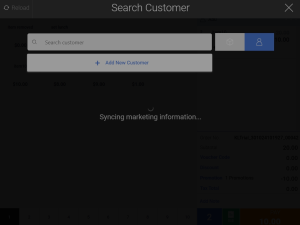
Cashiers can now see the reload button directly on the customer search page without navigating to the sales screen. This enhancement makes it easy to sync all marketing data, including customer details, promotions, membership information, and points rules. It also ensures any newly created customers are instantly available.
Follow the steps below on how to sync the customer information:
1. Go to the Customer Search page and click the Reload button located at the top left
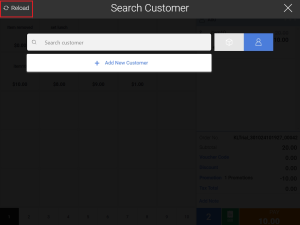
This will refresh the member list, making sure that any newly added members are visible right away.
2. Cashier wait for the reload process to complete. Once syncing is done, cashier will have the latest customer information available.
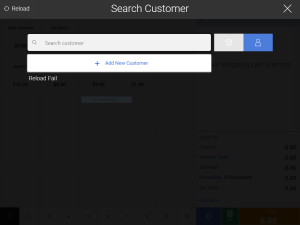
3. If there’s an internet issue, a “Reload Fail” error message will be displayed.
(POS/Android POS) Add Scroll Bar for Customer Notes (Windows) and Customer Details (Android)🖥️🤖 

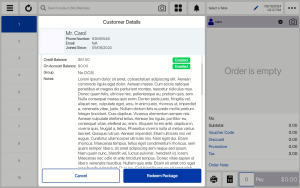
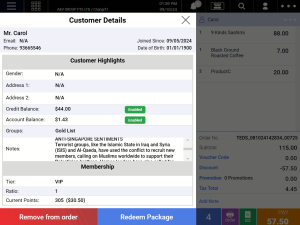
A scroll bar has been added to improve readability of long customer notes. Cashiers now can easily read long customer notes without missing important information!
On Android POS, it is available on the customer details screen, while on Windows POS, the scroll bar appears directly beside the customer notes section.
Cashier can navigate to customer details to view the customer note.
Android POS view:
Windows POS view:
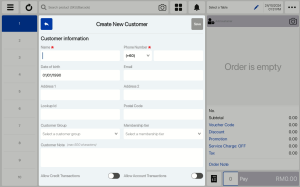
(Android POS) Create Customer - Set default country code based on country of operations🤖
On the V5 Android POS, the country code is now automatically set based on the country of operation when creating a new customer. This update reduces the time spent manually selecting the country code for each new customer, reduces data entry errors, and supports accurate data collection for loyalty programs.
User taps Add Customer to open the Create Customer screen. The phone number field will display the default country code based on backend settings (e.g., +60 if the business is in Malaysia).
(Android POS) Table Management - Display table colour based on BE configuration🤖 

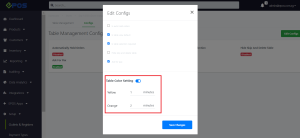
Android POS now can display tables with color codes based on how long they’ve been occupied!
Follow the steps below to config the table display color:
1. User navigate to backend > Set up> Outlet & Register > outlet > Table management > click on Edit Configs.
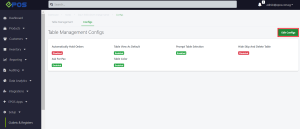
2. User toggle on the table color setting and adjust the time setting.
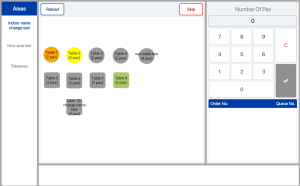
3. Cashier takes orders (or customers order by scanning QR code) and monitors table colors:
a. Table is in green once an order is taken,
b. Table turns yellow after 1 minute,
c. Table turns orange after 2 minutes.
(Kitchen Display System (KDS)) Table View 👨🍳
The Table View supports the overall view of all orders categorized based on the Table number. Additional orders from the same table will be appended under the same chit. User may click on the icon below on the most far right to toggle between Order View and Table View.

How to Update
For POS related features, user will need to update the POS to the latest version, version 5.211.0.0.
For Backend related features, user are not required to perform any actions, the new features would automatically be updated.
Feedback
We value your input! If you encounter any issues or have suggestions for further improvements, please don’t hesitate to contact us.
Stay Connected
Stay updated with the latest news and updates by following us on our social platforms.
Thank You
We appreciate your continued trust in EPOS. This update is just one of many steps we’re taking to provide you with the best POS system on the market.
If you have any questions or need assistance with the update, please contact our support team at:
Call: 6871 8833 / Email: [email protected] / Whatsapp: 8482 1888

Was this article helpful?
YesNo