No products in the cart.
August 2024
This August, several features across our POS, Backend, and Web Ordering App have implemented features to enhance the experience of both the users and customers.
What’s New
Not sure which affects you?
These icons indicate which group of users is impacted by each enhancement: Point of Sale (POS) users, Backend users, or Web Ordering App users.
( 🖥️ POS — ⚙️ Backend —📱 Web Ordering App —🤖 Android POS)
(Backend) Modifiers - Display Modifier groups for Linked Products⚙️
This update adds a detailed view of linked products and their modifier groups in the Modifiers section. Users can now see and sort linked products with associated modifier groups and easily navigate to detailed pages by clicking on the group names.
Users can manage linked products more easily and save time with efficient sorting and navigation.
1. Navigates to Products > Modifiers > Linked Products.
2. User sees a list with Product Name and SKU on the left, and linked Modifier Group, Type, Position on the right.
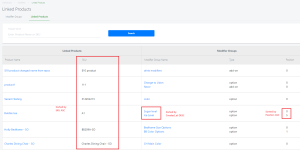
* User is able to search for Product name/SKU but unable to search for Modifier Group Name.
(Backend) Hide unavailable timings during certain timings on the WebApp⚙️
User are able to choose whether to hide or show unavailable items based on specific timings set in the backend. This allows stores to control item visibility and present the menu accurately.
1. Navigates to Kiosk & Web Ordering > Products & Menu Listing > select pencil icon.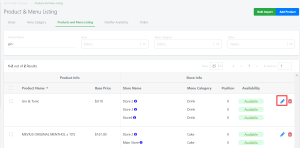
2. Edit the available timings for certain products.
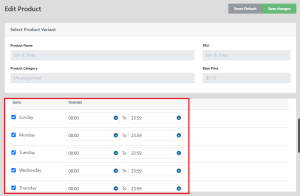
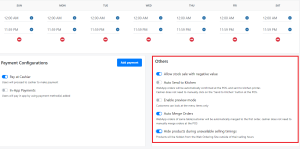
4. Navigates to Kiosk & Web Ordering tab > Stores > select the pencil icon to config the store.
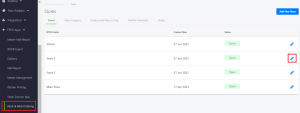
5. In the ‘Others’ section, users can toggle on and off the ‘Hide products during unavailable selling timings’ button.
(Web Ordering) Hide unavailable timings during certain timings on the WebApp📱
On the web ordering site, the results will reflect the following:
Customers won’t be able to view the unavailable items when the ‘Hide products during unavailable selling timings’ is toggled on.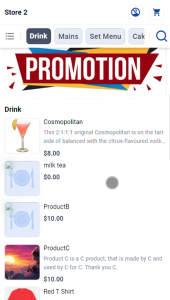
The unavailable items will be displayed when the ‘Hide products during unavailable selling timings’ is toggled off.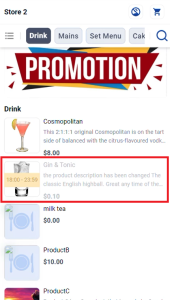
(Backend / Web Ordering) WebApp improve syncing time for kiosk-webapp when product changes are made⚙️📱
This enhancement reduces the synchronization time between the V5 Backend and the WebApp/Kiosk, ensuring that product updates, such as changes to names, prices, and images, are reflected on the WebApp/Kiosk within 30 seconds.
User updates product details (e.g., name, prices, images) in the backend.
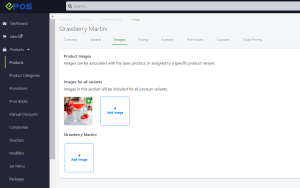
Within 30 seconds, the system automatically syncs and updates the information displayed on the Kiosk/WebApp.
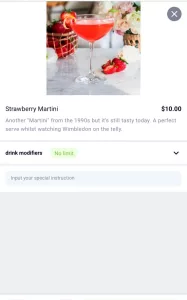
(Web Ordering) Capture PDPA and Marketing Materials consent📱
User are able to enable the Marketing Material consent when Register a New Account in WebApp.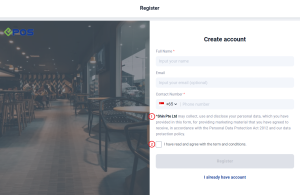
1. Users can now choose whether to receive marketing materials when registering a new account.
2. Users are informed through a sentence on the registration form that their data may be collected, used, or processed in compliance with PDPA regulations when they fill out the form.
(POS) Climate Voucher - Display Climate voucher as payment method🖥️
Climate Voucher Redemption is Now Available!
Cashiers can now redeem Climate Vouchers in both the Windows and Android POS systems using the following steps:
1. Add Eligible Products: Start by adding NEA voucher eligible products to the cart, then click the Pay button.
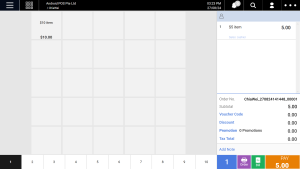
2. Select Payment Type: Choose “Climate Voucher” as the payment type.
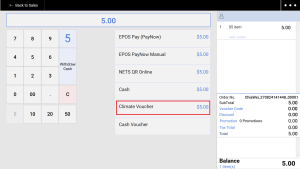
3. Apply Voucher Code: Scan the QR code to apply the voucher, then click on the ‘Redeem’ button.
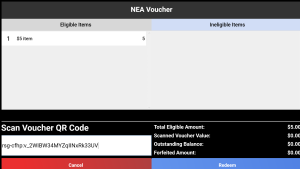
4. Complete the Transaction: If the entire order amount is covered by the Climate Voucher, the transaction will be completed.
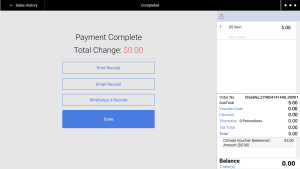
5. If there’s an outstanding balance, proceed with Split Payment to complete the order.
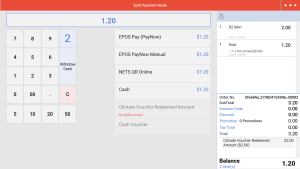
Refer Climate Voucher for more details.
(Android POS) Climate Voucher - Display Climate voucher as payment method 🤖
Climate Voucher Redemption is Now Available!
Cashiers can now redeem Climate Vouchers in both the Windows and Android POS systems using the following steps:
1. Add Eligible Products: Start by adding NEA voucher eligible products to the cart, then click the Pay button.
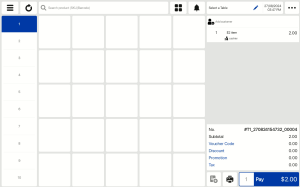
2. Select Payment Type: Choose “Climate Voucher” as the payment type.
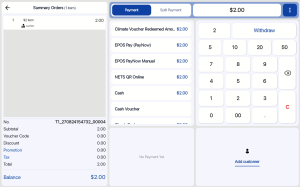
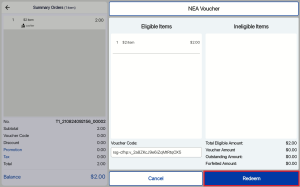
3. Apply Voucher Code: Scan the QR code to apply the voucher, then click on the ‘Redeem’ button.
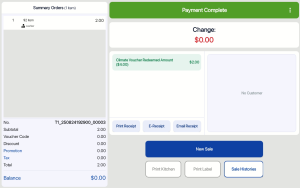
4. Complete the Transaction: If the entire order amount is covered by the Climate Voucher, the transaction will be completed.
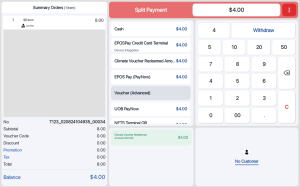
5. If there’s an outstanding balance, proceed with Split Payment to complete the order.
Refer Climate Voucher for more details.
(Android POS) UOB PayNow - Add voice notification for payment received 🤖
A voice notification has been added to the Android POS system to announce payment completion and the payment amount for EPOS PayNow transactions.
This feature helps minimize errors and potential fraud by providing real-time confirmation of each transaction.
Cashier selects EPOS PayNow as the payment method.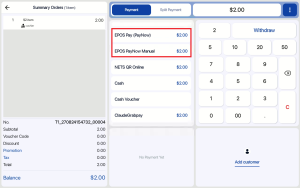
Upon payment completion, a voice notification will announce the received payment amount.
(Android POS) Display Paynow QR on LCD screen🤖
The Android POS system now displays the PayNow QR code on the LCD screen during transactions to streamline user interaction.
The LCD screen displays the QR code for customers to scan and initiate payment.

Upon successful payment, the LCD screen shows a success message with a green tick.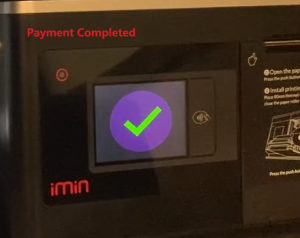
If the payment is canceled, the QR code is removed from the LCD screen.
(Android POS) EPOS Pay PayNow - Add manual completion button🤖
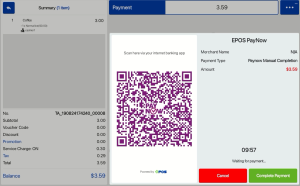
A “Complete Payment” button has been added to the Android POS frontend for EPOS Pay (PayNow) transactions. This feature allows users to manually complete payments, matching the backend’s manual completion capability.
1. Cashier selects the EPOS PayNow payment method and inform customer that EPOS PayNow is ready.
2. Cashier verify that payment has been received.
3. Tap the “Complete Payment” button to finalize the transaction.
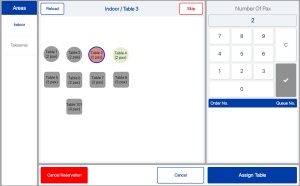
(Android POS) Table Management - Reserve button display without booking plugin🤖
The reserve button in the V5 Android POS system will now be displayed when the booking plugin is not installed. This feature streamlines the process for cashiers to reserve tables directly in the POS system after receiving a phone booking.
1. Ensure that the booking module is not installed.
2. Navigate to table layout view > select an empty table > click on Reserve button to reserve a table > proceed to take order.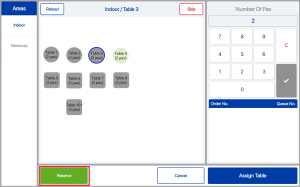
3. Click on Cancel Reservation button if customer would like to cancel.
(Android POS) Web Order Syncing🤖
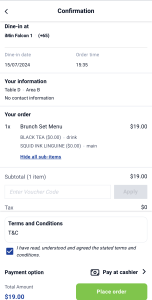
This new feature introduces the syncing of orders made through the WebApp or QR code with the V5 Android POS system. Orders placed through the WebApp or by scanning a QR code at the table will now be automatically displayed on the POS system.
In the QR or Web Ordering site,
1. Customers place order by scanning QR code on the table or direct URL visit.
In the Android POS App,
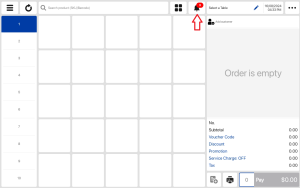
1. Cashier receives sound notification for WebApp or QR orders
2. Tap on notification (bell icon) to visit third party view
3. View & select order on “Pending Confirmation” list
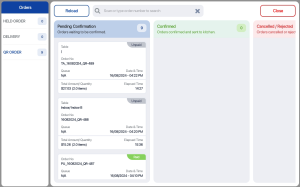
4. Tap on retrieve order and send to kitchen printer
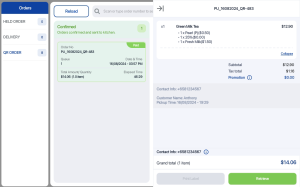
5. Print bill and accept payment if the customer has not yet settled the amount.
(Android POS) Table management text display and table action🤖
Users can now access and manage tables more efficiently with improved text display and actions.
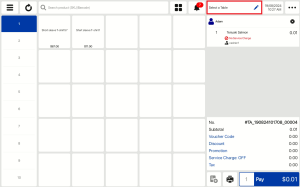
1. Access Table Management: Tap the pencil icon in the sales view to open the Table Management view.
2. When no table is selected: Display ‘Select a Table’.
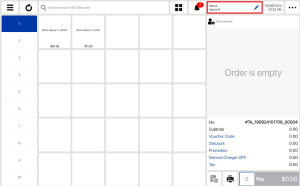
When there is an existing table selected: Display the table area and table name.
3. User is able to change tables or merge tables’ bills.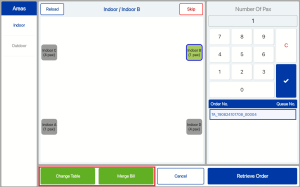
How to Update
For POS related features, user will need to update the POS to the latest version, version 5.211.0.0.
For Backend related features, user are not required to perform any actions, the new features would automatically be updated.
Feedback
We value your input! If you encounter any issues or have suggestions for further improvements, please don’t hesitate to contact us.
Stay Connected
Stay updated with the latest news and updates by following us on our social platforms.
Thank You
We appreciate your continued trust in EPOS. This update is just one of many steps we’re taking to provide you with the best POS system on the market.
If you have any questions or need assistance with the update, please contact our support team at:
Call: 6871 8833 / Email: [email protected] / Whatsapp: 8482 1888

Was this article helpful?
YesNo